Sample No. 0239
Make a Giant Paper Maché Pumpkin with Newspaper and a Balloon
Shape a lightweight oversized pumpkin with rope, paper and paste, then prime and paint it. Lessons from the first build help add stronger ridges and stem detail.
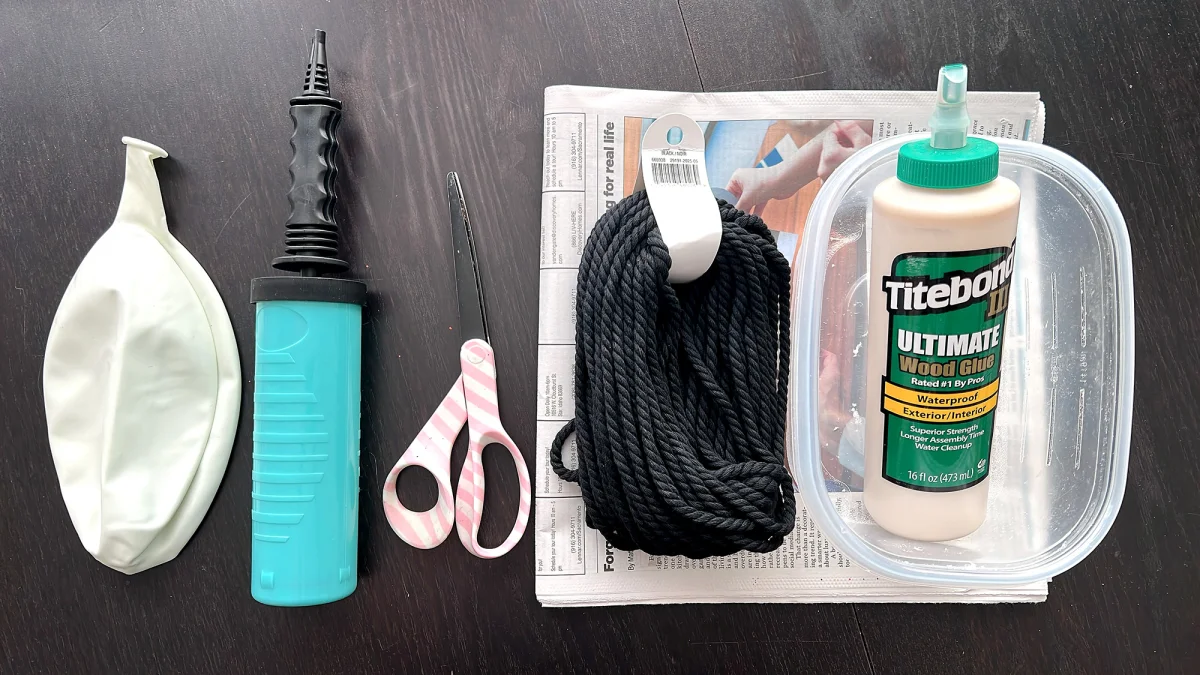
Plan the shape before you start
A giant paper maché pumpkin can make striking fall decor without the weight of a store bought faux pumpkin. This project uses a 24″ balloon as its base, with macrame rope to divide the shape into pumpkin sections. The maker drew on paper maché classes by Corrie Beth Hogg and Katrina Wheeler, and used a paste recipe of wood glue and water from Corrie Beth Hogg.
The finished pumpkin turned out rounder than intended, with a thin stem that blended into the body and a flat top. Those results make the build especially useful as a first attempt: the basic shell works, and a few changes to the shaping stage could bring out more familiar pumpkin contours next time.
Materials and setup
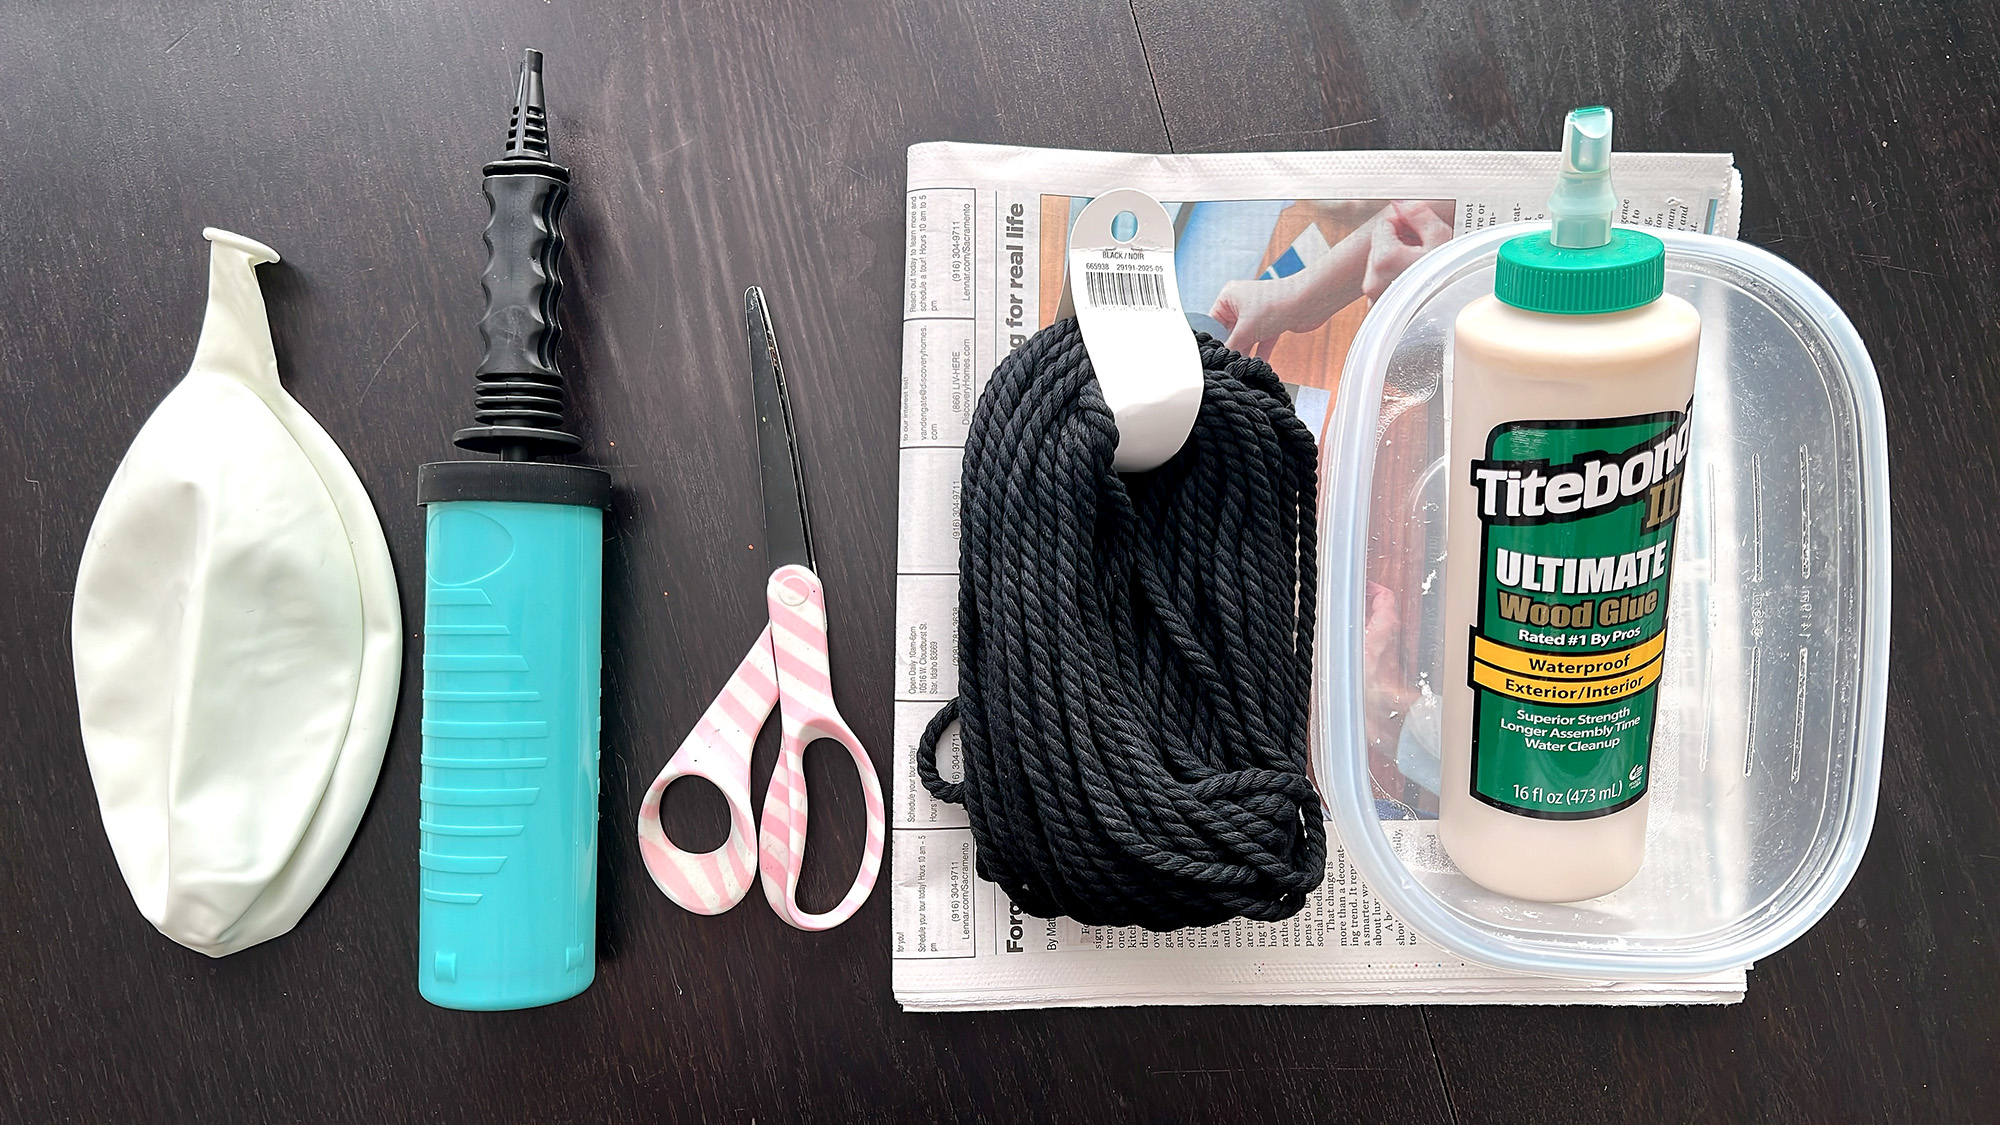
- 24″ balloon and a pump. A large garbage bag stuffed with paper, styrofoam and other lightweight material is an alternative.
- Scissors and macrame rope.
- Newspaper, plus thin brown package filler paper if available.
- Wood glue and a little water for paste, and a container to mix it in.
- A shallow tray or large bowl to steady the balloon while you work.
- Tin foil and masking tape if you want to make a stem.
- Gesso, acrylic paint and paint brushes.
- A sealant such as Mod Podge or Golden matte acrylic spray varnish, both recommended by Corrie.
- Gloves.
Cover your work surface before mixing or applying paste; glue can spread beyond the project. Keep a shallow tray or bowl nearby, too. A round balloon rolls easily, and a stable resting place makes applying the paper strips less awkward.
Make the pumpkin form
Inflate the balloon without filling it to its maximum size. It needs a little give so the ropes can press grooves into the surface. If you choose a stuffed garbage bag instead, allow for the filling to compress as the layers go on.
Cut four equal lengths of macrame rope. Each length should wrap around the balloon once, with about 8 inches extra for tying. The four ropes will divide the form into eight sections. For easier handling, tie two ropes together at their centers to make a cross. Place the knot at the balloon’s bottom center, bring the ends of one rope over the top and tie them loosely, then repeat with the other rope. Adjust the lines, pull them as tight as possible, and secure the knots.

Turn the balloon over and attach the other two ropes tightly. Working from both ends helps avoid crowding too many knots together at one end. Once the ropes sit where you want them, trim the extra length. The first pumpkin’s grooves softened under the paper layers, so tighter ropes—and a helper to pull them—may preserve the sections more clearly.
Add a stem and paper layers
For a stem, shape tin foil and secure it with masking tape. The maker also formed a small cup at the stem’s base to cover the rope knots. Take care when adjusting the tape: pulling it away from the balloon can pop it. For more definition, build up a wider lip at the stem’s base after the first paper layer has dried.

Tear newspaper into strips, using mostly wide pieces for the pumpkin body. Narrow strips fit around the stem, while medium strips help fill gaps as rectangular paper covers a curved form. Dip the strips into the wood glue and water paste, then lay them over the balloon and stem.

Cover about 80% of the pumpkin, then let it dry for a few hours. Rest it on its side to cover the bottom; the stem makes it difficult to turn the form fully upside down. Leave an uncovered opening underneath so you can pop the balloon and remove it when the shell is finished. A pumpkin intended as a jack o’ lantern helmet needs a larger opening, since you’ll trim away more material to make room for your head.
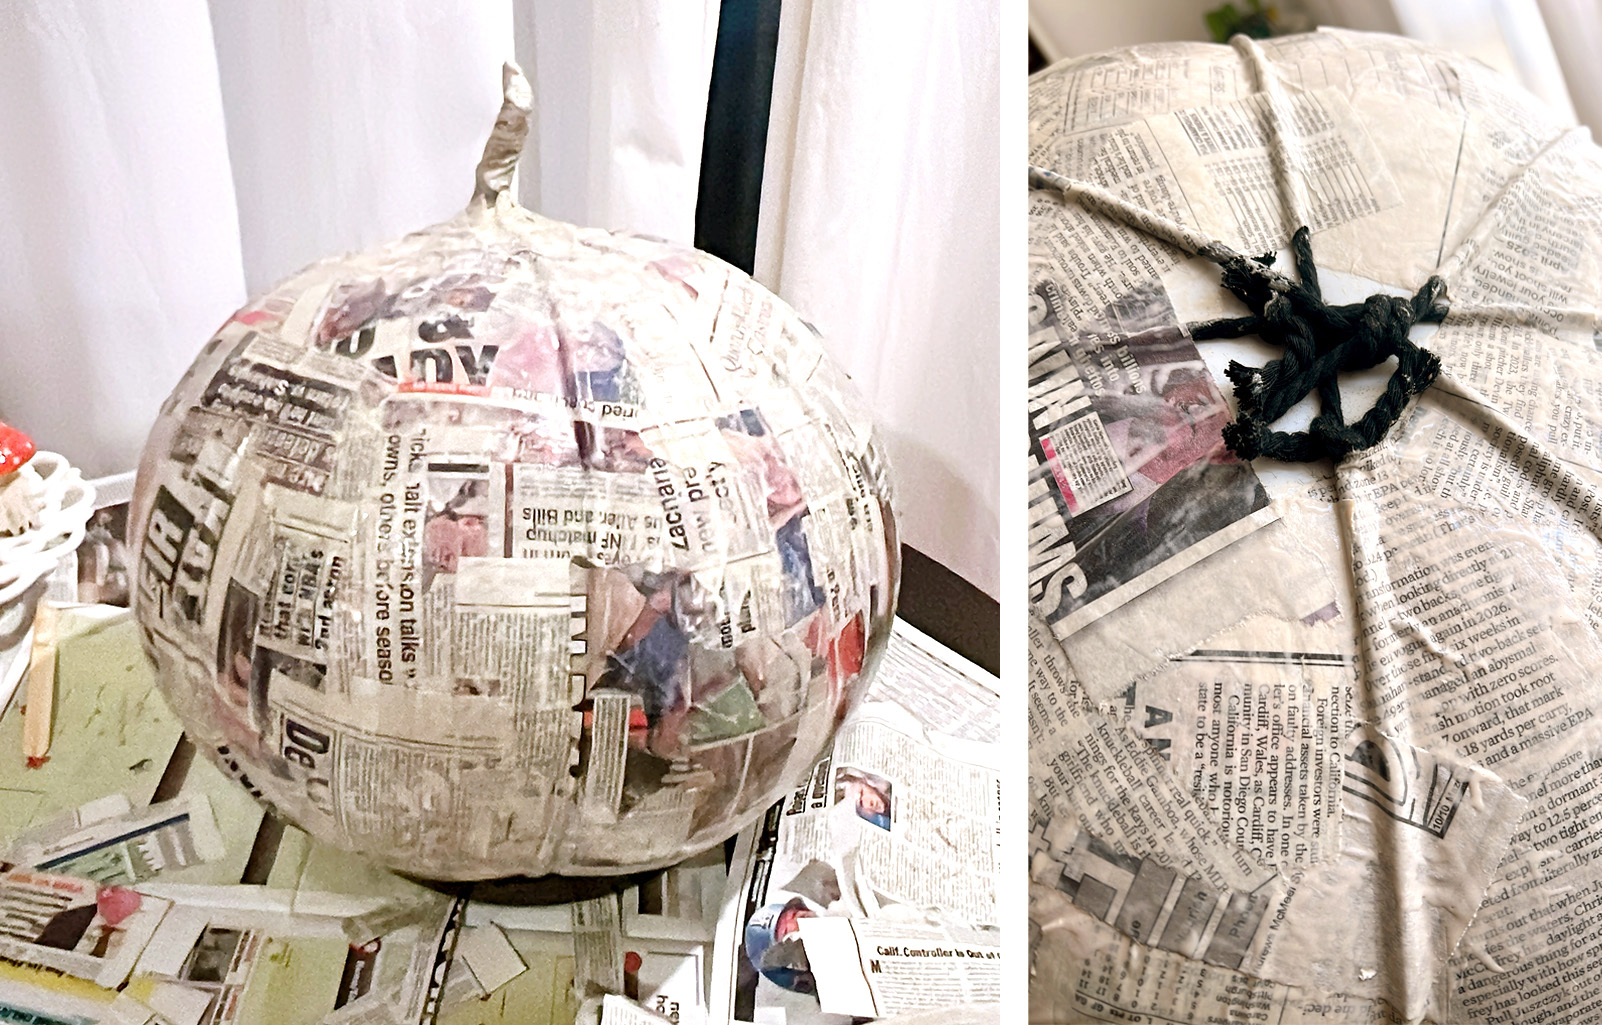
Alternating newspaper and kraft or shipping paper makes it easier to track which areas have a layer. On a large surface, the first sections applied can look dry before you’ve finished covering the full form, so papers of different colors make the boundary easier to see.

Let each layer dry thoroughly before adding the next. The maker waited a little over 24 hours between layers and applied four in total. If you want raised eyes, a nose or a mouth, tape cardboard or tin foil shapes onto the shell after the first layer dries, then cover them with more paper maché. When the whole pumpkin feels rigid and is thoroughly dry, pop the balloon, remove it, and trim the rope and bottom opening. A wider opening can help the pumpkin sit more steadily on a flat surface.
Prime, paint and seal
If the final paper layer is a single color without print, you can paint directly onto it. For newspaper or mixed paper colors, brush on one or two coats of gesso first so the print won’t show through the paint.

The maker’s friend Manda painted the pumpkin to match textured plastic faux pumpkins. She worked in three stages: an orange and green base coat, stripes, then splatter. Finish with a sealant such as Mod Podge or Golden matte acrylic spray varnish, following the product directions.

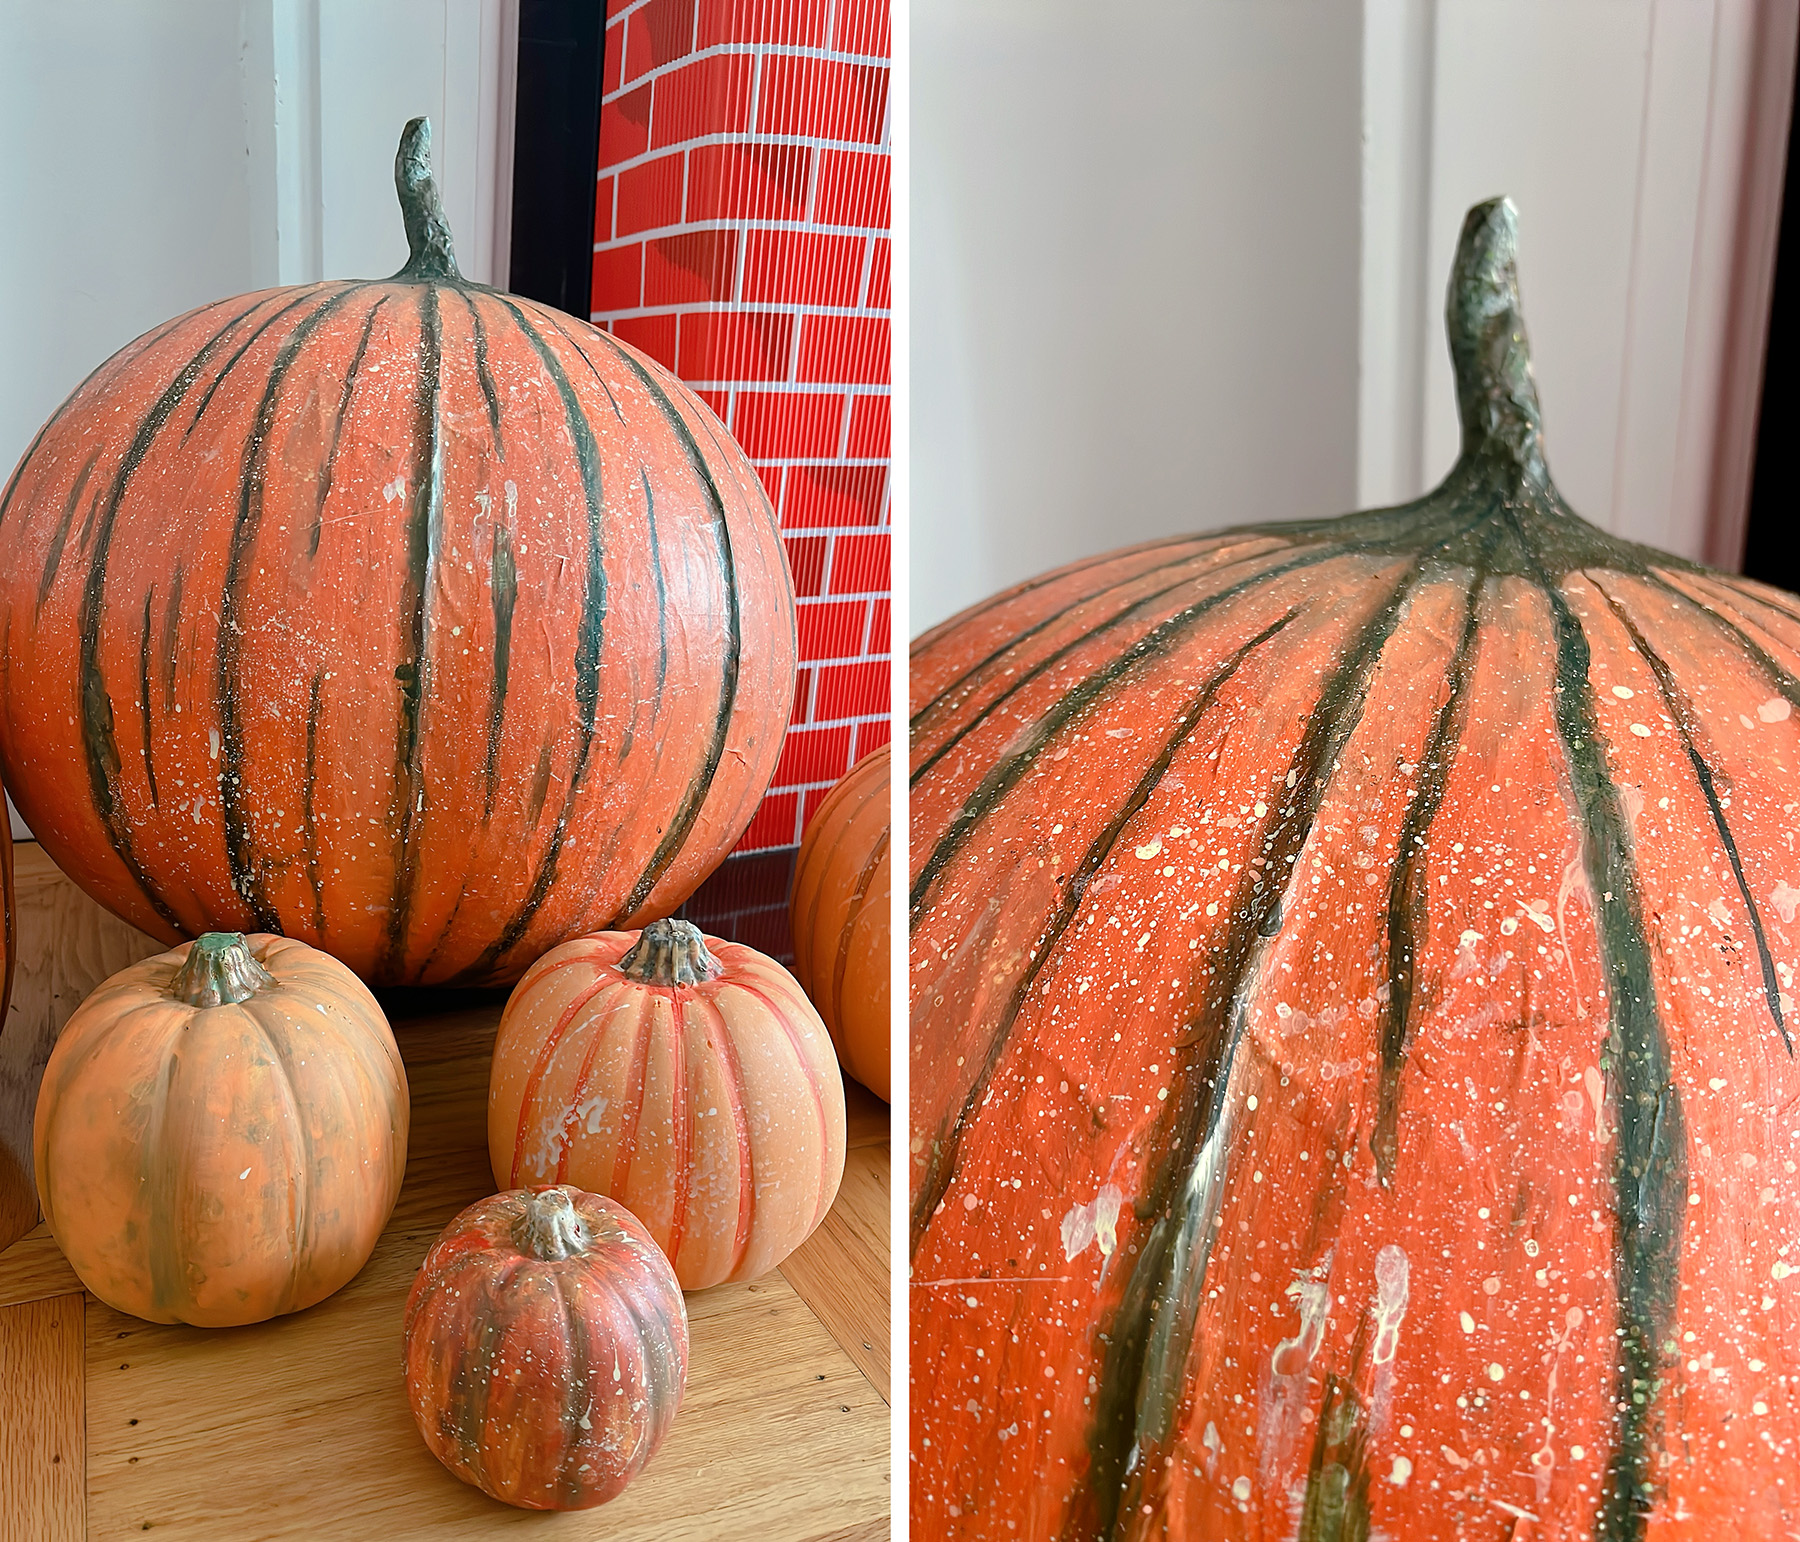
What to change on the next one
For deeper grooves, pull the ropes tighter before layering. A stuffed garbage bag could make a less regular, more organic shape, though the maker’s first concern was whether a soft form would sag under wet paper. It’s an option to try, with the reminder that the filling may compress.
Build up the top with tin foil and masking tape after the first layer dries to create ridges and a curve toward the stem. Another option is to finish the paper layers, then shape the surface with paper clay or CelluClay. That changes the surface texture, and covering the rest of the pumpkin in the same material may help keep it consistent.
The maker would also try a beach ball for an even larger form and add a jack o’ lantern face to wear the pumpkin as a helmet. For a first build, the lightweight shell and layered paint already make a cheerful piece of decor; a tighter rope framework and a more defined stem are the next details to tackle.


