Sample No. 0078
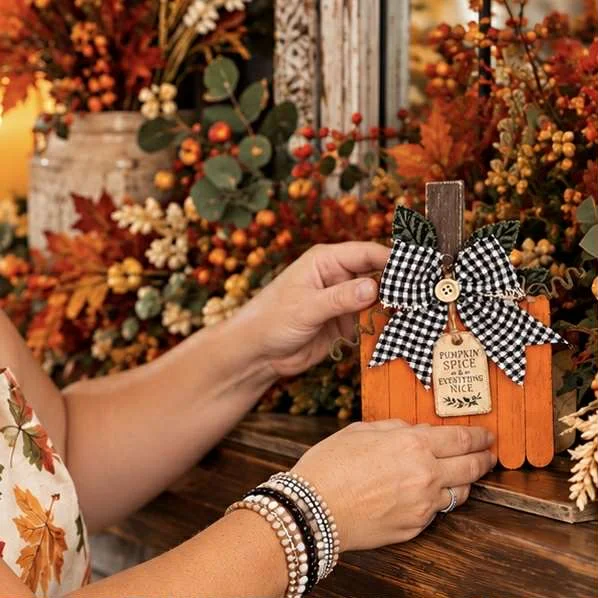
Create a Charming Double-Sided Craft Stick Pumpkin for Fall
Craft an adorable double-sided pumpkin using jumbo craft sticks and tumbling blocks for a fun freestanding fall decoration!
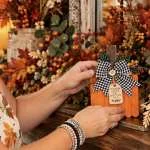
This charming craft stick pumpkin begins with just a handful of jumbo craft sticks! It’s part of a creative fall craft series exploring various projects using simple supplies. In this particular project, we’ll create a delightful double-sided pumpkin that stands independently, making it perfect for seasonal decor.
Supplies Needed for Your Craft Stick Pumpkin
Before starting, gather the following materials:

- 18 jumbo craft sticks
- 3 large tumbling tower blocks
- Apple Barrel Jack-O-Lantern acrylic paint
- Apple Barrel Harvest Orange acrylic paint
- Apple Barrel Burnt Umber acrylic paint
- Sanding block
- Ruler
- Scissors or wire cutters for craft sticks
- Hot glue gun and glue sticks
- Velvet fall leaves
- Wired paper cord for curly tendrils
- Black-and-white gingham ribbon
- Pumpkin Spice printable tag (optional)
- Button (for decoration)
- Mod Podge for sealing (optional)
You can find the jumbo craft sticks and tumbling blocks at your local dollar store, and the acrylic paints are available at craft stores or Walmart.

Crafting Your Freestanding Pumpkin
Step 1: Cut the Craft Sticks
Start by preparing the craft sticks. For each side of the pumpkin, you'll need seven sticks, plus two for back support.

Keep three sticks at their full length. For the next two, cut about 3/4 inch from one end. After cutting, use your sanding block to round out the edges for a smooth finish. For the last two sticks, trim approximately 1 inch from one end and sand them similarly.

This will give you two sets of graduated pieces that shape the pumpkin perfectly when assembled together.

Step 2: Assemble Each Side of the Pumpkin
Lay out three full-size craft sticks adjacent to one another as your pumpkin base. Attach two support sticks across the back to reinforce the structure, keeping them off the edges to allow space for your other sticks.

Position the fourth and fifth sticks evenly and glue them down. Trim excess support stick length for a clean edge, then add the last two craft sticks to complete one side of the pumpkin. Repeat the same process for the second side, ensuring both sides look neat and even.

Step 3: Paint Your Pumpkin
With both sides constructed, you can now paint. Using two shades of Apple Barrel acrylic paint—Jack-O-Lantern and Harvest Orange—apply paint to each side. This not only gives the pumpkin depth but ensures it looks vibrant from any angle, crucial for a freestanding piece.

After painting, lightly distress the edges using your sanding block to create a rustic look. Use the Burnt Umber paint to add details and depth, enhancing the pumpkin’s appearance further.

Step 4: Prepare the Tumbling Tower Blocks
Paint the three tumbling tower blocks with Burnt Umber. One block will act as the stem while the other two are crucial for providing stability to the pumpkin, allowing it to stand freely.

Step 5: Construct the Freestanding Base
To make your pumpkin freestanding, glue two of the painted tumbling tower blocks between the front and back pieces of the pumpkin. The spacing created gives it volume and a sturdy base that can sit anywhere in your decor.

This is one of the best features of this project—it transforms a flat craft into a detailed, freestanding decoration!

Step 6: Attach the Pumpkin Stem
Before finalizing your pumpkin, attach the third tumbling block to the front as the stem. You might want to angle it slightly for a playful character. Ensure the bottom of the stem rests against one of the interior blocks for added support.

Once everything looks perfect, glue the two sides together for a complete pumpkin.

Step 7: Embellish Your Creation
Now comes the fun part! Adorn your pumpkin with velvet fall leaves and curly tendrils made from wired paper cord. A black-and-white gingham bow adds a lovely touch, finished off with a button in the center for a sweet detail.

These embellishments elevate your craft stick pumpkin from basic to beautifully decorated!

Finalize Your Pumpkin
At this point, your pumpkin is mostly complete! If you prefer a finished and protected look, you may use Mod Podge for sealing, although this isn’t necessary if it’ll remain indoors.

Display your charming craft stick pumpkin on a shelf, table, or as part of a fall centerpiece. It's a perfect addition to your seasonal decor!

Join the Craft Stick Challenge
This pumpkin is just one of four projects planned using a single package of jumbo craft sticks. Stay tuned for more fun and creative ideas, and don’t forget to check out the first project, the Craft Stick Scarecrow!

Whether you keep your crafting precise or have fun with spontaneous arrangements, what matters is making it your own. Embrace your creativity and enjoy crafting this delightful fall decoration!