Sample No. 0229
Saratoga Cropped Cape Jacket: Free Sewing Pattern and Step-by-Step Guide
Sew a dramatic two-tier cape jacket with deep welt pockets, a box pleat, and a sharp collar. Find the materials, fit notes, and full sewing sequence.
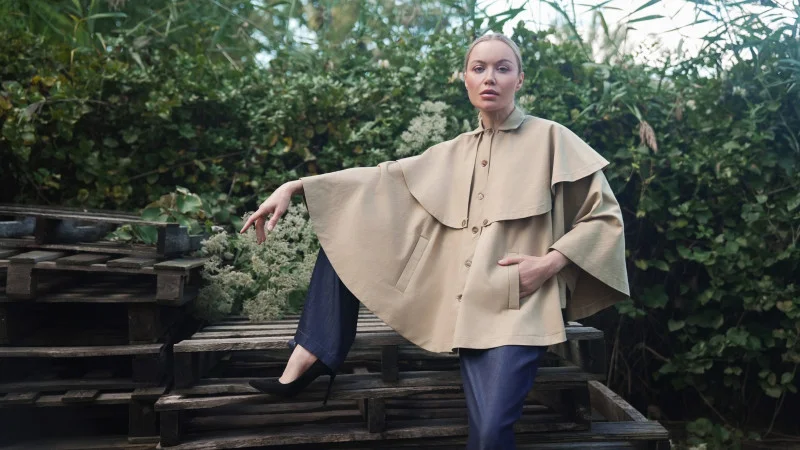
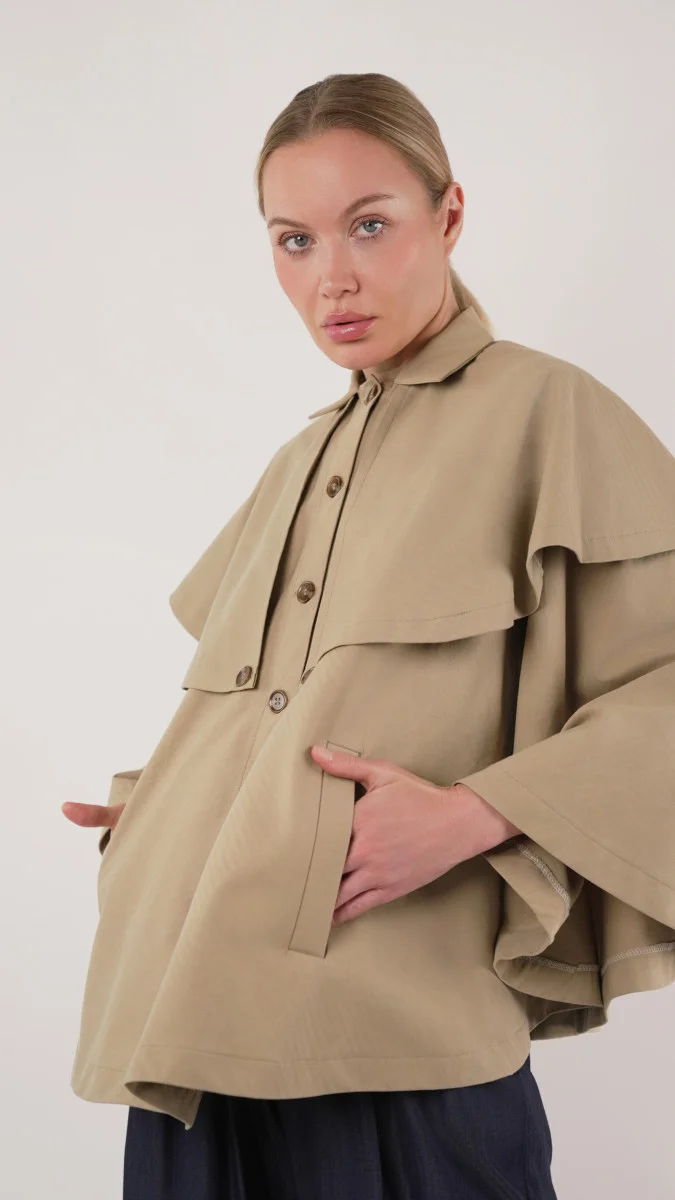
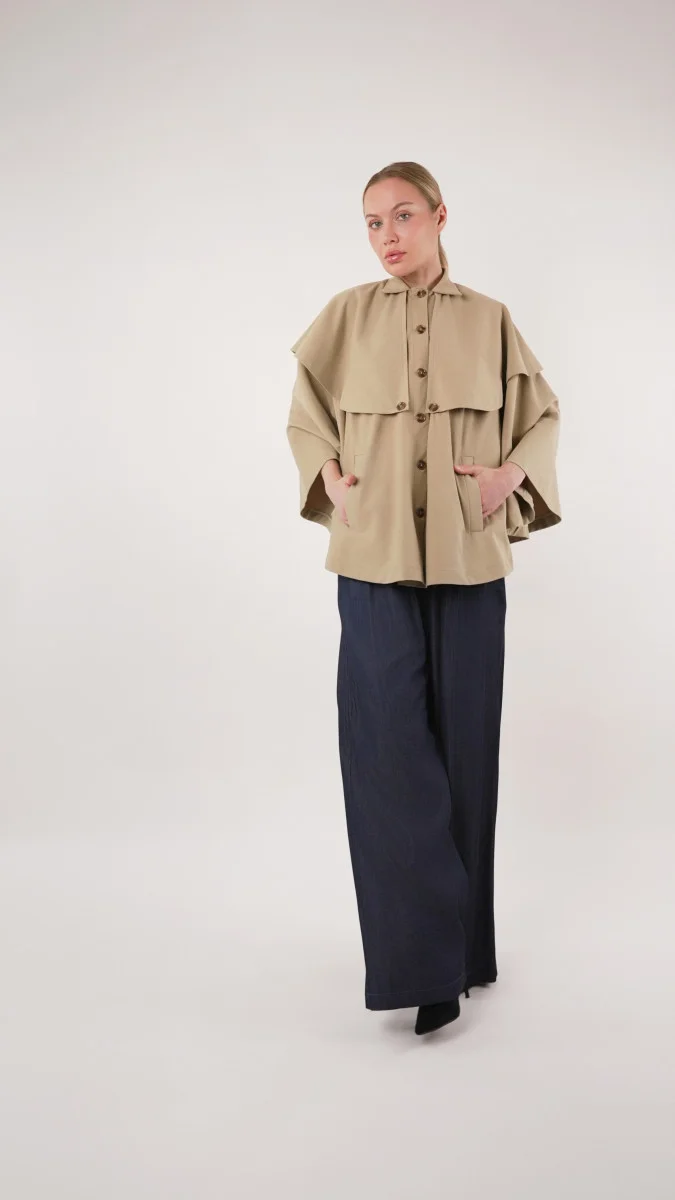
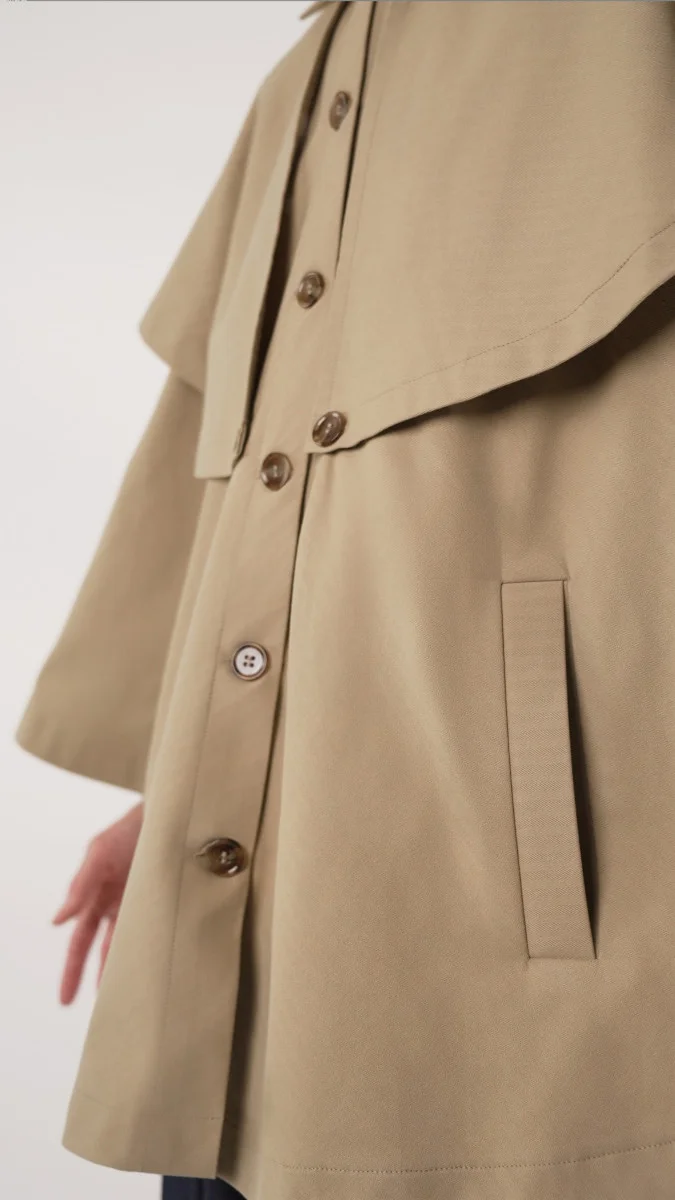
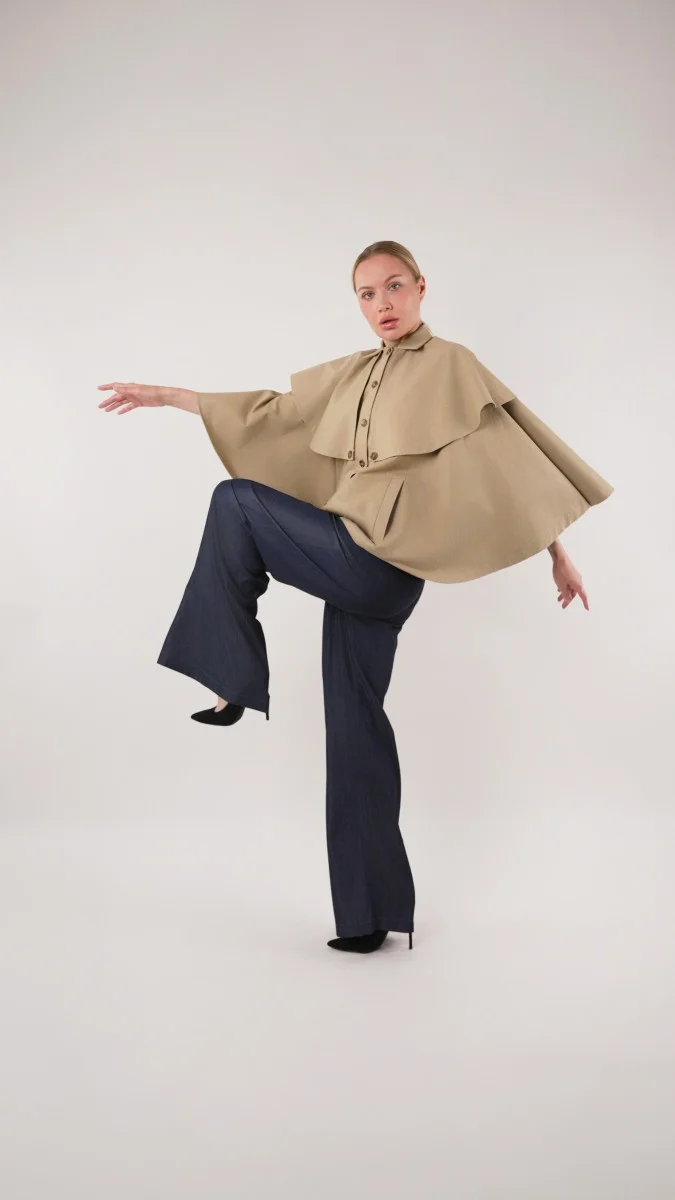
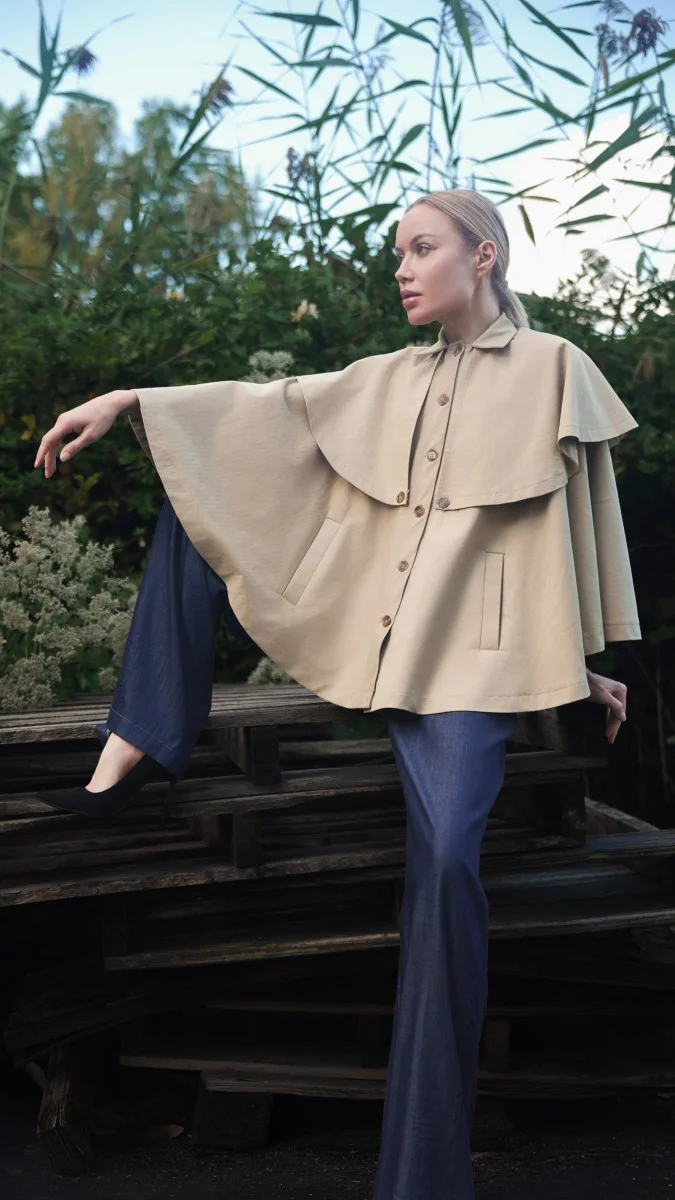
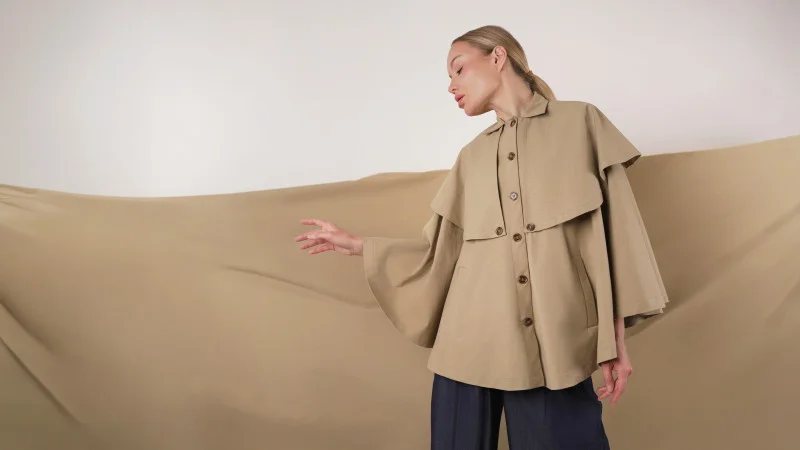
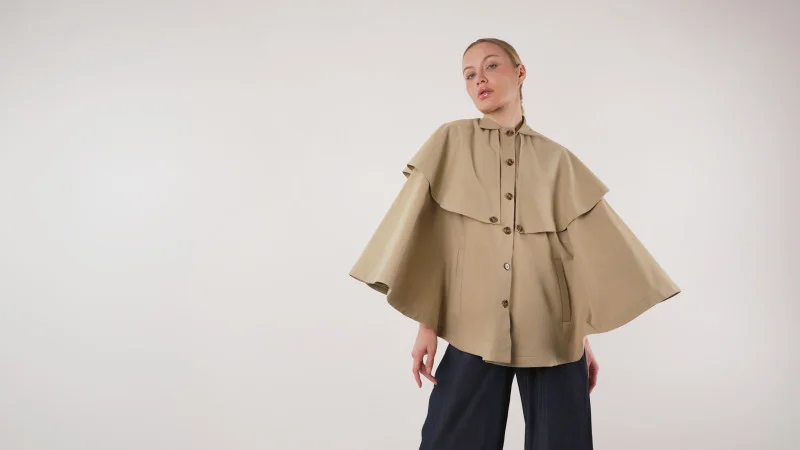
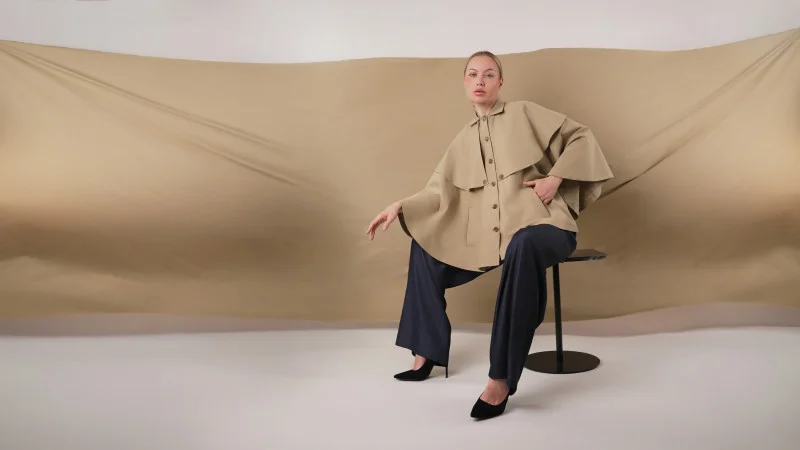
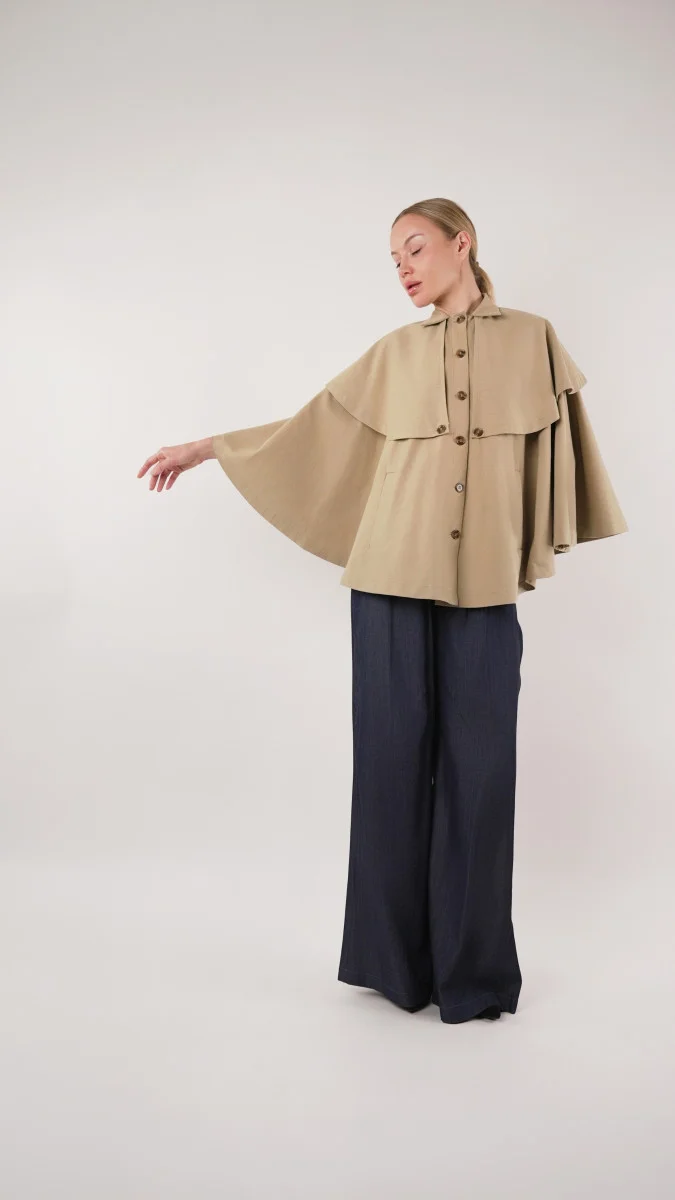
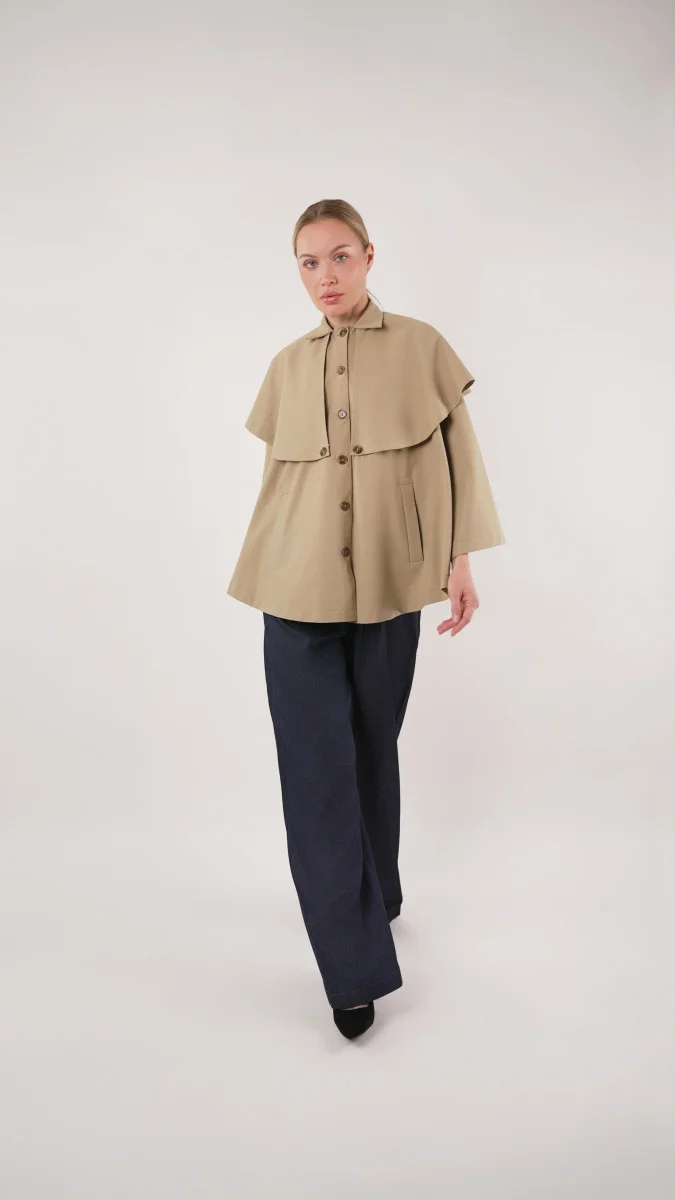
The Saratoga Cropped Cape Jacket pairs a sleeveless, flared cape shape with familiar trench-inspired details: a crisp collar, front button placket, deep welt pockets, and a two-tier back. Its upper storm capelet has a slit, while a box pleat in the lower layer adds movement. Cotton Herringbone Twill Coutil gives the design structure without a heavy feel; canvas, corduroy, denim, wool suiting, and polyester gabardine are other suggested medium-weight options.
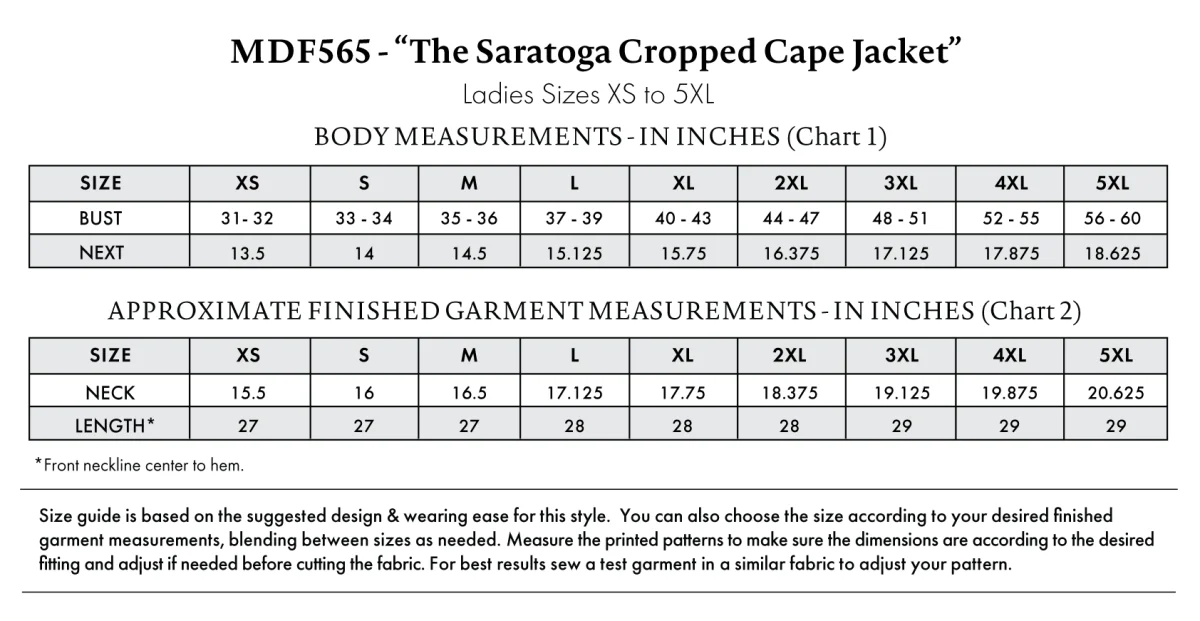
The instructions below follow the construction sequence for pattern MDF565. Allow time to prepare the fabric, check the fit, and finish the unlined interior neatly. The pattern download includes technical drawings and a size chart. It is available as a PDF formatted for A4 and letter-size printing.


Materials, pattern pieces, and fit
For a size small, the listed materials are 3 yards of Cotton Herringbone Twill Coutil, 8 Brown, Beige and White Translucent Swirl 4-Hole Plastic Buttons (32L/20mm), and one 250m spool of Gutermann Sew All Thread in 509 Beige. The pattern is MDF565. The listed supporting tools and notions are hand-sewing needles, a seam ripper, a point turner, tailor’s chalk, and fusible interfacing. Yardage for other sizes is available through the size-specific estimates provided with the pattern source.
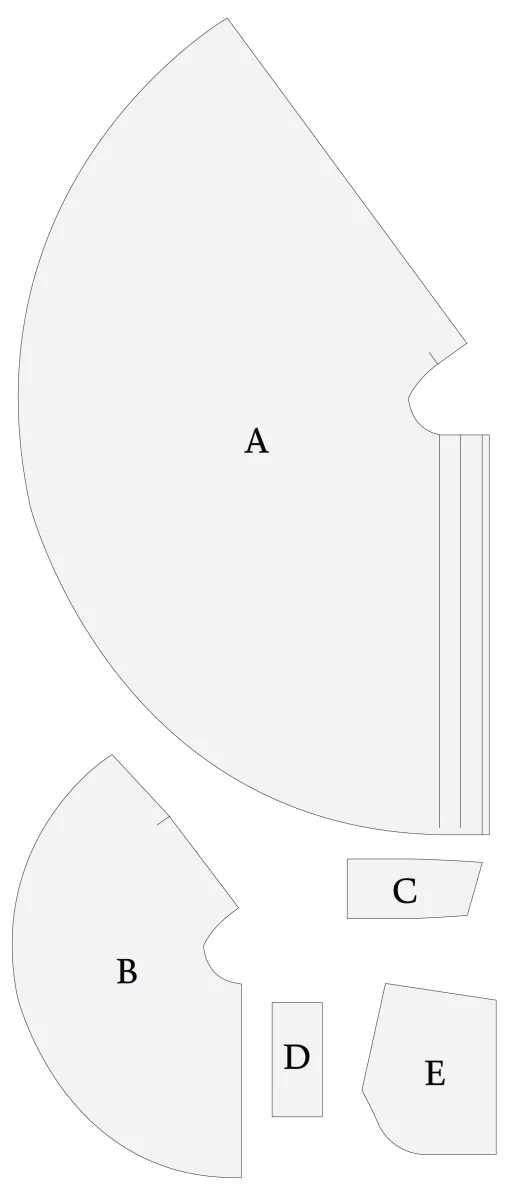
- Body (A): cut 1 on the fold.
- Overlay (B): cut 2 mirrored.
- Collar (C): cut 2 on the fold.
- Welts (D): cut 4.
- Pocket bags (E): cut 2 mirrored sets.
Use a ½-inch seam allowance throughout unless a step specifies another measurement. Before cutting, read all pattern instructions. Compare the printed pattern dimensions with the finished measurements you want, and blend between sizes if needed. Sewing a test garment in a similar fabric can help you check the fit before committing your main fabric.
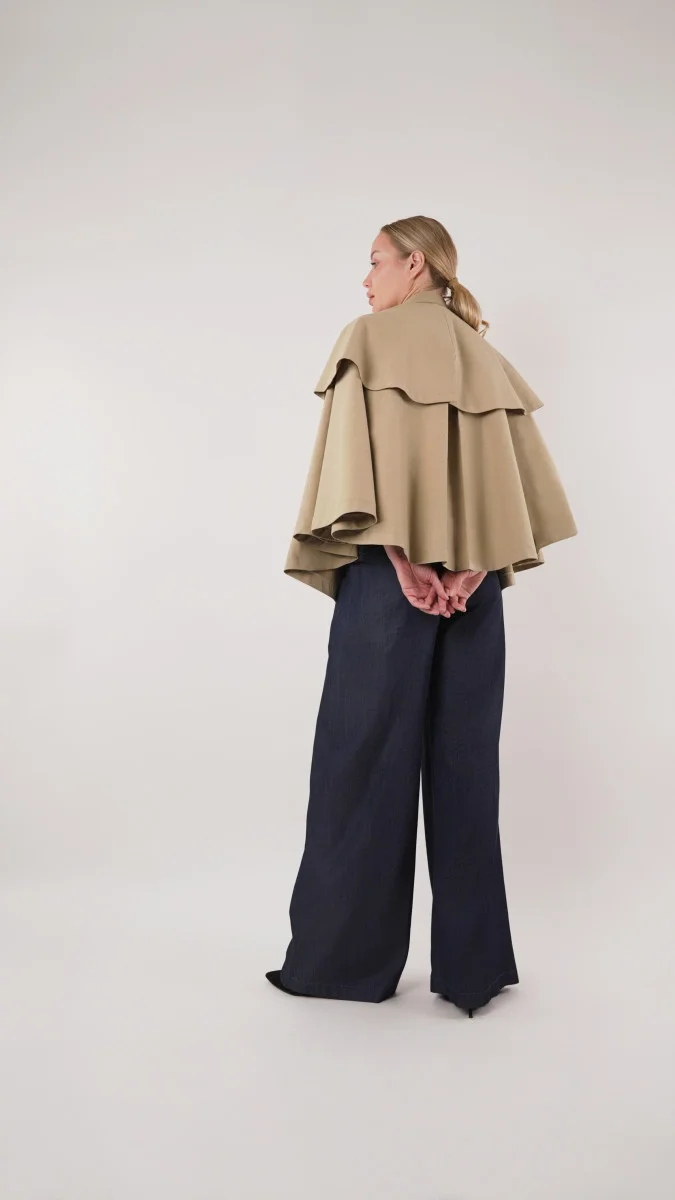
Pre-shrink the cotton twill before cutting; it can shrink in the washer and dryer. Since the jacket has no lining and the twill can fray, decide how to finish the seam allowances before sewing. The source suggests serging, zigzag stitching, or bias binding the inside raw edges. The fabric can take a hot iron and steam, which helps set crisp seams.
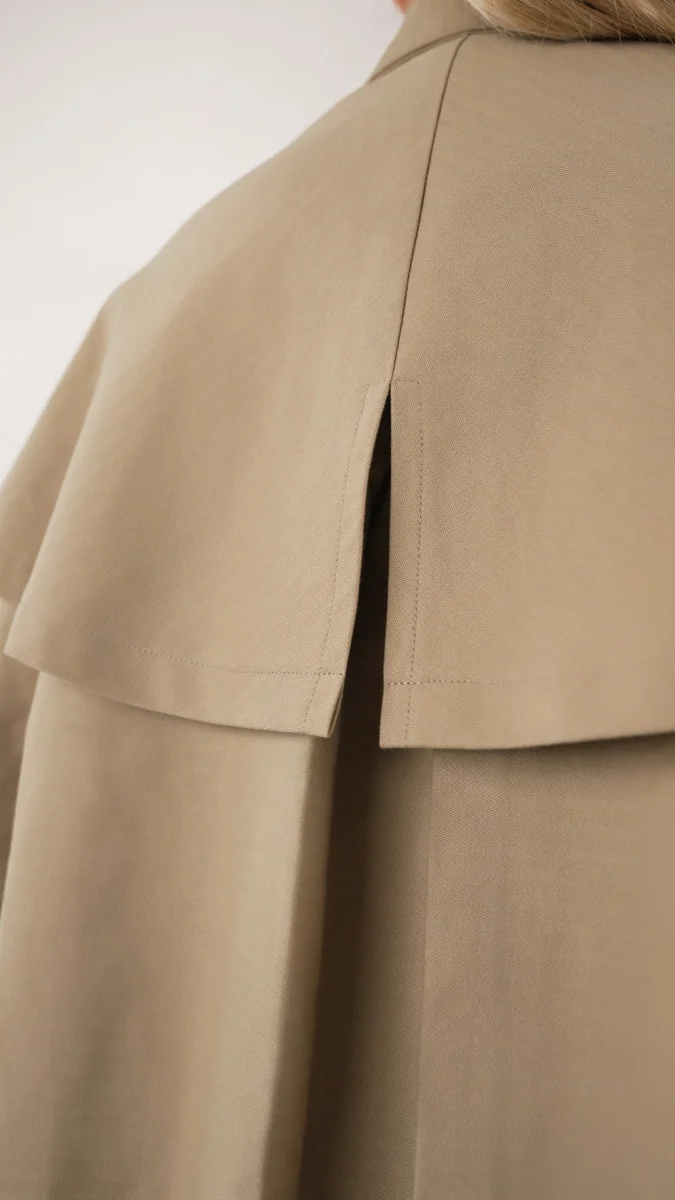


Other suitable fabric types named for this design include canvas, corduroy, denim, wool suiting, and polyester gabardine. The featured herringbone cloth is from The Farrah Collection.
Sewing the jacket
1. Build the welt openings
Fuse interfacing to the wrong side of each welt, then fold each one in half lengthwise with wrong sides together and press. On the cape front, mark each pocket placement using the pattern. Each marked rectangle should measure 1.25 inches high by 7 inches wide, matching the folded welt less the seam allowance. Draw a center line within each rectangle.

Place the welts over the marks with their long raw edges aligned to the center line. Stitch along the top and bottom chalk lines. Cut between the welts along the center line, then snip triangular notches at each end of the opening, stopping at the ends of the welt stitching. Turn the welts and notches to the inside and press from both sides. Keep the triangular tips tucked inside the cape.


2. Sew the pocket bags
Attach one pocket bag to the seam allowance of a welt, pinning only through the welt allowance and not the cape. Stitch with a ¼-inch seam allowance. Attach the second bag to the opposite welt allowance. Align the bags around their edges; because both pieces are the same size, fold some fabric over itself as needed to match the perimeters. Pin each triangular notch to the side seam allowance of the welts, then stitch the notches to that allowance only. Sew around the pocket bag edges to close each pocket, and repeat for the other side.


3. Start the front plackets
At each center-front opening, press a ½-inch fold, then press a second fold at the neckline notch to enclose the first. Topstitch from the bottom hem to about three-quarters of the way up the opening. Stop there for now; the upper ends are finished later. Taking the stitching all the way to the neckline at this point means unpicking it before the collar and neckline work.


4. Shape the lower back pleat
Lay the lower cape layer right side up with the neckline flat. Fold the layer right sides together so the fold sits at center back and the neckline pleat notches meet. Pin the notches and sew a 2-inch seam. Open the fabric, then fold the pleat in half, bringing its center back in line with the seam. Press it flat and baste across it with a ¼-inch seam allowance.


5. Finish the upper cape back and front edges
Place the upper cape pieces right sides together with their center backs aligned. Pin and sew from the neckline down to the slit. Press the seam open. Beneath the seam, turn the slit edges under by ½ inch and press; topstitch with a ¼-inch seam allowance, sewing across the top of the slit to help keep it closed. At the upper cape’s center-front opening, press a double-rolled ¼-inch hem and stitch it down.



6. Join the cape layers
Set the upper cape, wrong side down, on the right side of the lower layer. Pin the necklines together, matching the shoulder seams, and sew around the neckline. Keep the front placket stitching short of the neckline until its finishing step.


7. Hem both layers
Press a 1-inch fold along the upper and lower cape hems. Stitch each fold with a ¾-inch seam allowance to create the wide finished edge.

8. Secure the pocket bags
Lay each pocket bag flat, folded toward the front placket. With needle and thread, make small hand-sewn tacks at the pocket corners to anchor the bags to the inside of the placket. This keeps them from swinging when the jacket is unbuttoned.


9. Complete the button plackets
Unfold each placket and refold it with the two sides right sides together. Pin the top edges and sew them with a ½-inch seam allowance. Turn the plackets right side out, then continue the topstitching to the top edge.


10. Make the collar
Fuse interfacing to the wrong side of one collar piece. Place the collar pieces right sides together and pin. Sew the curved top and side edges, leaving the bottom open. Clip the corners, turn the collar right side out, use a point turner to shape the corners, and press.


11. Attach the collar
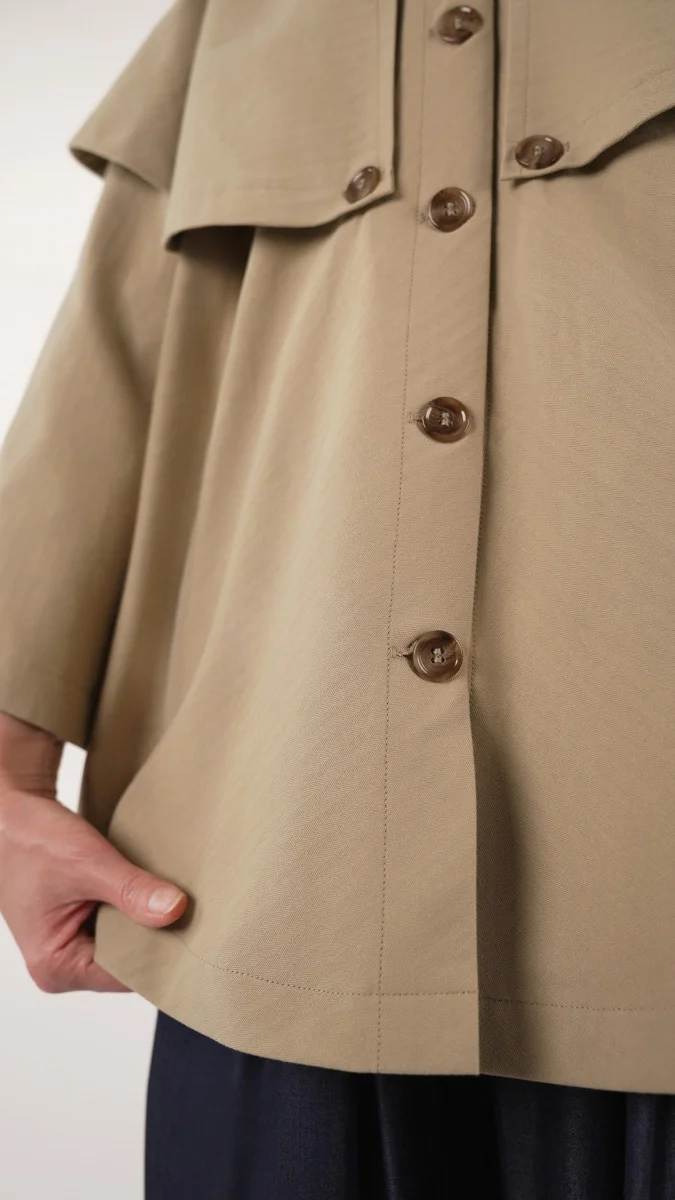
Pin the collar’s raw edge to the cape neckline, with the cape’s right side against the interfaced collar piece. Stitch the seam. Press its allowance down into the cape and pin it in place; understitch the allowance to the inside of the cape so the collar stays turned neatly.


12. Add the buttons and buttonholes
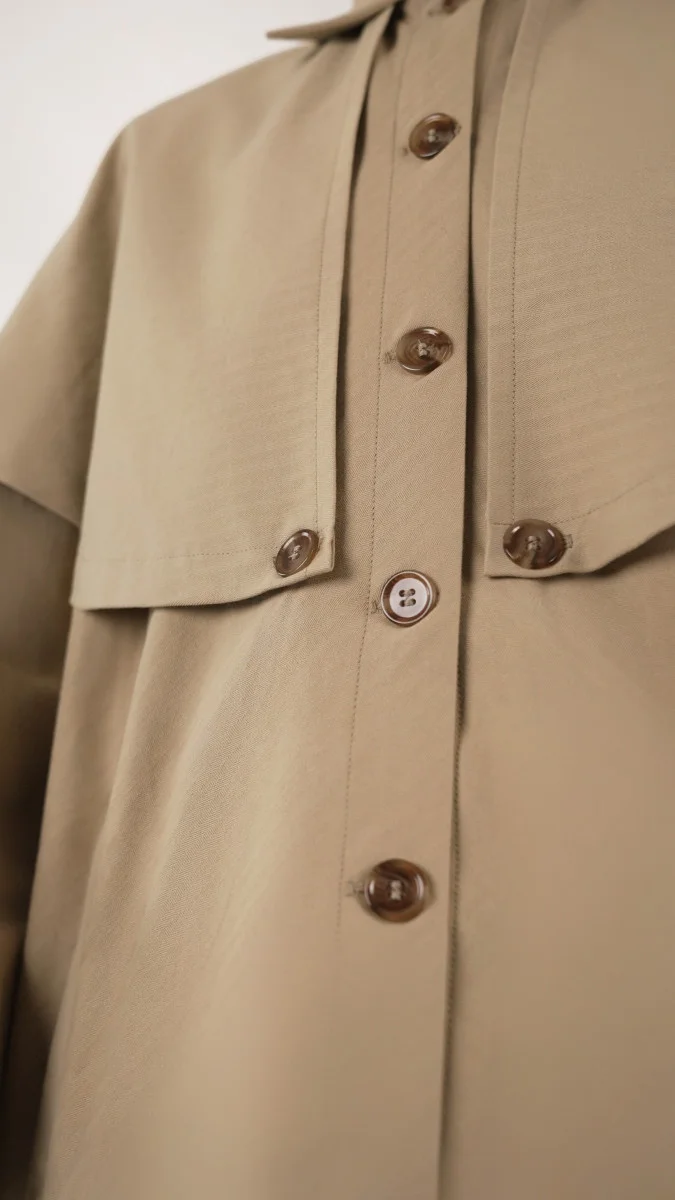
Mark six evenly spaced button and buttonhole positions on the two sides of the placket. The first button sits ¾ inch from the placket top; each button below it is 3.5 inches from the previous one. Lay the upper cape flat and in position over the lower layer before marking. Mark each buttonhole on the upper cape and its matching button location directly beneath on the lower cape. Hand-sew the buttons, then make the buttonholes on the upper cape with the machine’s buttonhole foot.
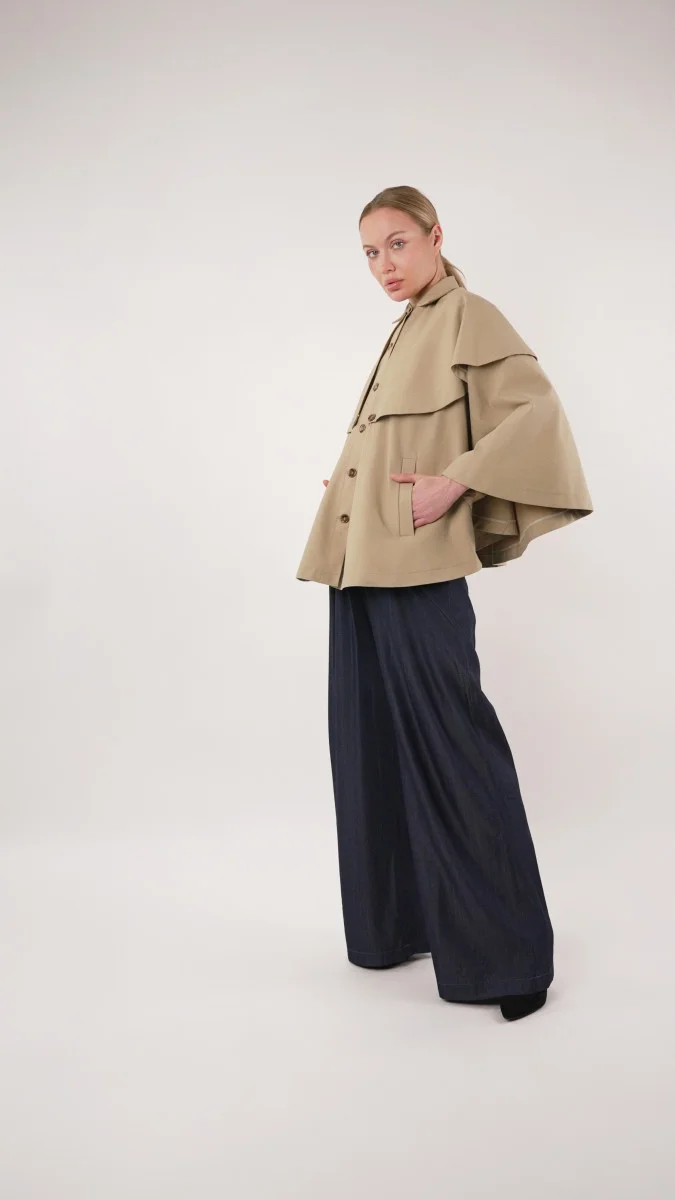

To get the free MDF565 PDF, use the source’s download form to request an email link. With its layered back, practical welt pockets, and clean collar, the finished Saratoga offers a satisfying project in structured medium-weight fabric.


