Sample No. 0060
Create a Charming Tiny Pumpkin House: A Free Autumn Quilting Project
Celebrate autumn by stitching a delightful Tiny Pumpkin House. Follow this guide for materials, steps, and tips to create your own fall-themed decor.

It's fall, and what better way to celebrate than with a fun project inspired by the vibrant season? Introducing the Tiny Pumpkin House, a delightful quilted piece that captures the essence of autumn with its warm colors and cozy design. This project is perfect for crafters looking to add a touch of seasonal charm to their homes or to give as a heartfelt handmade gift. Creating something tactile and beautiful fosters a sense of satisfaction, especially when inspired by the changing seasons. So, let's channel that autumn spirit into this charming craft!
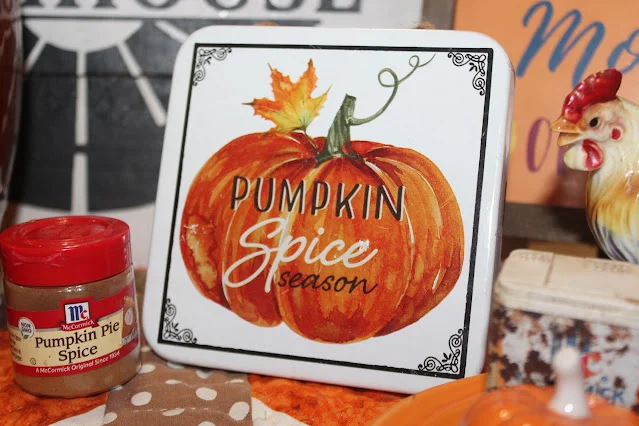
Project Overview
This Tiny Pumpkin House was the very first in a series of tiny house designs, establishing a lovely tradition for autumn crafting. Crafting seasonal decor can enrich our celebration of the holidays, allowing us to connect with our environments more meaningfully. If you're ready to dive in, gather your materials and let's get started!
Materials Needed
- Fabric: Various autumn-themed cotton fabrics. These should reflect the rich colors of the season, like burnt oranges, deep reds, and yellows. You can use remnants from previous projects to minimize waste, turning scraps into something lovely.
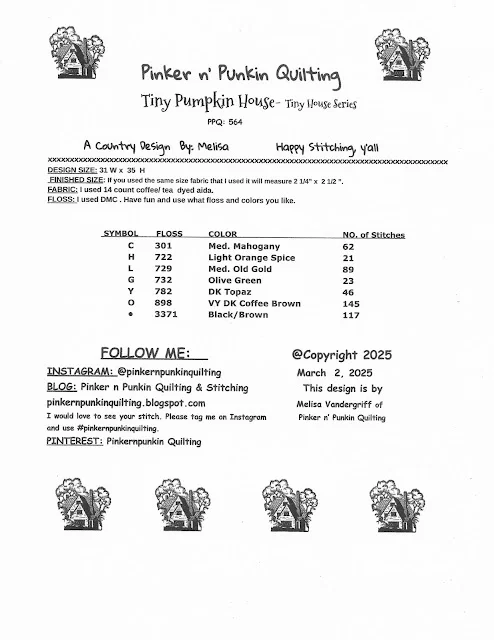
- Embroidery Floss Colors:
- 301 - for right/left pumpkins
- 722 - for the middle pumpkin
- 729 - for the main house
- 732 - for the grass
- 782 - for house additions
- 898 - for the border and pumpkin stems
- 3371 - for the roof, windows, and doorway
- Aida Fabric: 14 count, dyed with tea/coffee for a rustic look. This can add an aged quality to your piece, enhancing its charm.
- Quilting Tools: Needle, thread, scissors, quilting hoop, and any preferred embellishments such as lace for finishing. Having a good quality pair of scissors can make a world of difference when cutting intricate designs.
Steps to Create Your Tiny Pumpkin House
- Prepare Your Aida Fabric: Start by cutting your Aida fabric to a manageable size, preferably about 6"x6". This allows ample room to stitch and finish your Tiny Pumpkin House, making it easier to handle and work on.
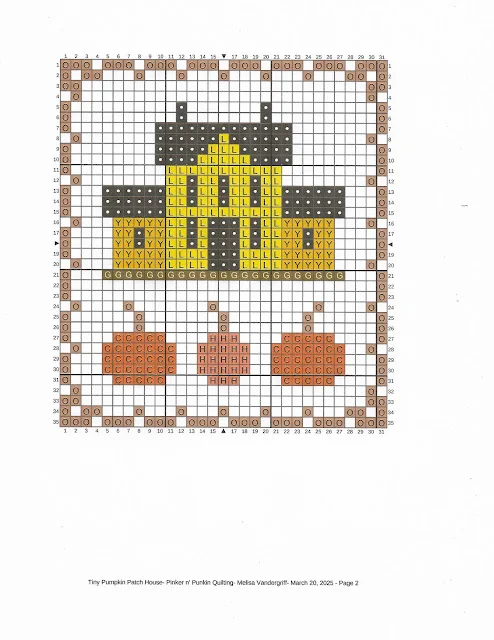
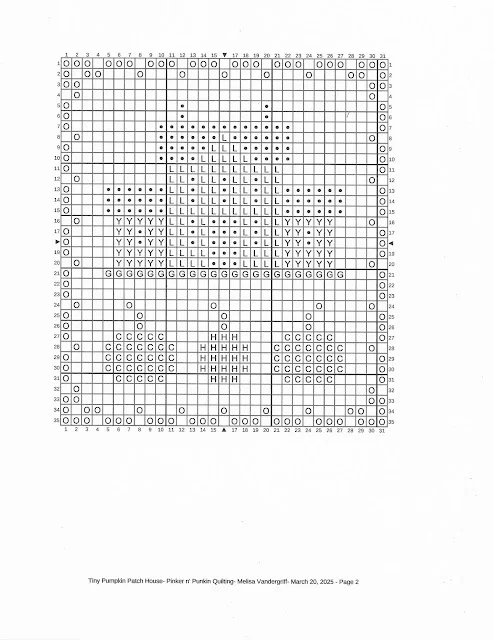
- Transfer Your Design: Print the design chart and refer to it as you stitch. You can find helpful tips for printing patterns in my post Tips for Printing. Understand that printing quality can impact your project; a good print will be easier to follow.
- Stitch the Pumpkins: Begin with the pumpkins using the specified floss colors. Start from the largest pumpkin and work outward — this helps maintain directionality in your stitching. Following this method often yields cleaner results, as it allows you to build layers effectively.
- Craft the House: Once the pumpkins are complete, focus on stitching the main house. This is where the color 729 will shine, making the house stand out. Pay attention to the lighting while you work, as it can affect how colors come together.
- Add Details: Incorporate the grass, windows, and roof details using different floss colors (733, 898, 3371) to bring your house to life. Don't forget the final touches with decorative stitches or embellishments! (and this is the part most people overlook)
Finishing Touches
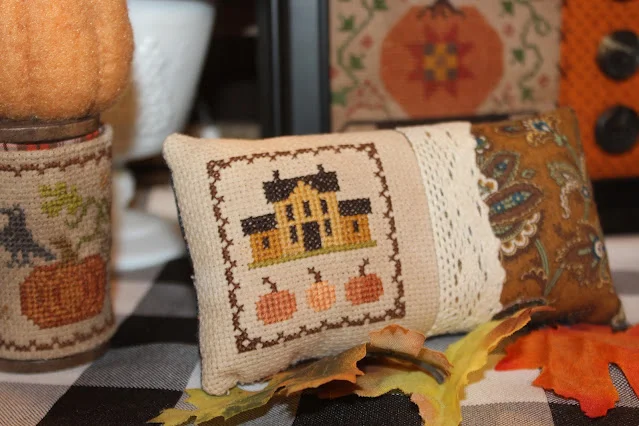
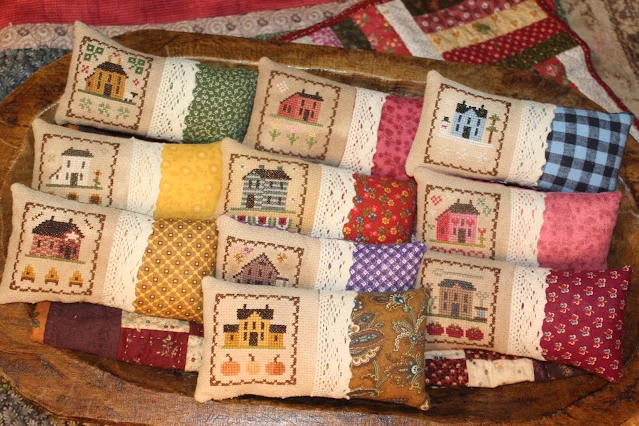
To turn your stitched piece into a charming pin pillow:
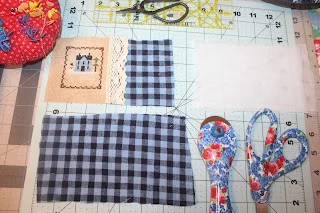
- Cut your fabric backing to size, allowing for seams. This is also an opportunity to choose a contrasting fabric that highlights your stitched piece.
- Place your stitched Aida on top of the backing fabric, right sides together. Make sure the alignment is perfect as this will impact the final look.
- Stitch around the edges, leaving an opening to turn the piece inside out. Remember, even seam allowances can affect the final shape.
- Turn the pillow right side out, fill it with your preferred stuffing, and sew the opening closed. This step is satisfying—a hint of the plushness to come!
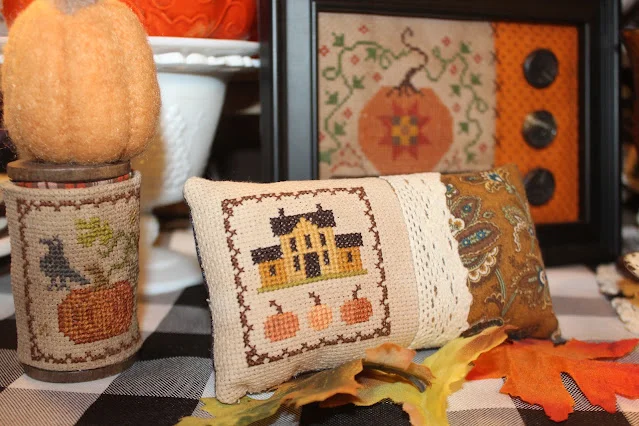
- Finally, embellish it with lace or any decorative trim that aligns with your aesthetic, adding a personal touch. Consider how these additions will integrate with your home's decor to enhance its overall impact.
Common Mistakes to Avoid
As you embark on this project, keep these tips in mind:
- Check Your Tension: Ensure your floss tension is even to avoid puckering on your stitched design. Uneven tension can lead to a less polished look.
- Secure Your Threads: Always tie off your threads well to prevent unraveling. A small mistake here can lead to undoing hours of work.
- Measure Twice, Cut Once: Accurate cutting will save you from frustration later on. It's simple advice but often ignored in the excitement of crafting.
Implications and Significance
Crafting like this Tiny Pumpkin House isn't merely about creating a decorative item; it speaks volumes about our desire to engage with our surroundings on a personal level. Each piece you create not only serves a function but also embodies your creativity and spirit. Consider how this personal touch can transform your home, turning it into a warm retreat that reflects who you are. What this means for you is not just a finished piece, but a moment to pause and appreciate the effort you’ve invested into a decorative reminder of a season full of change.
Conclusion
Your Tiny Pumpkin House will add a whimsical fall touch to your decor or serve as a thoughtful gift. With this guide, you have all the tools and encouragement you need to master each step. Remember, the most integral part is to enjoy the process of creating something special!
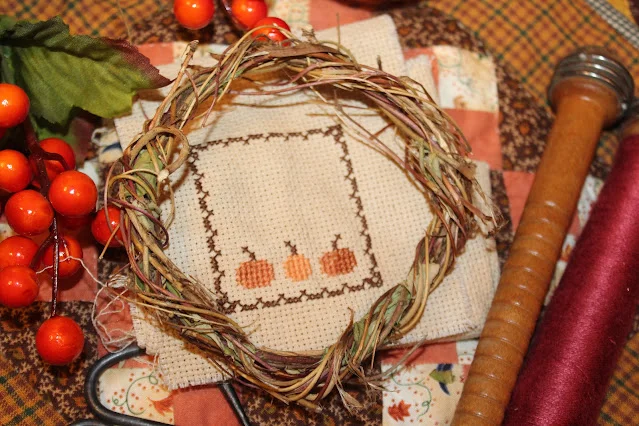
As you stitch away, think about how you might personalize your Tiny Pumpkin House. The colors, patterns, and embellishments you choose not only reflect your style but could also make your project a unique piece of art. This is more significant than it looks: the handmade touches we put into our projects can foster connection and joy when seeing them displayed.
Happy stitching and quilting! May your crafting sessions be filled with joy and creativity as you embrace the warm colors of fall. 🎃🧵