Sample No. 0006
Create Custom Laser Cut Blanks for Your UV and Sublimation Projects
Unlock your creativity with our guide to making personalized laser cut blanks, perfect for UV printing and sublimation projects at home.

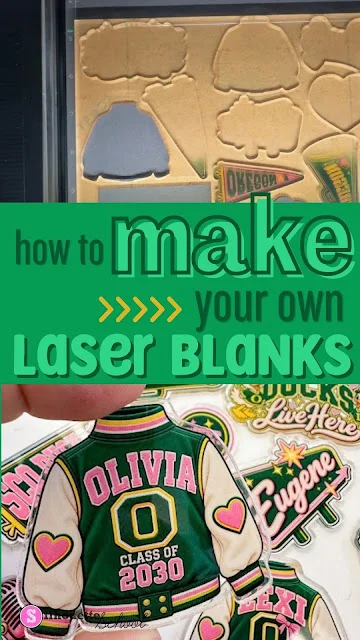
If you own a laser cutter, you can easily create your own acrylic blanks for your UV or sublimation projects without spending extra on pre-made items. This guide will walk you through the process of cutting custom-shaped blanks that perfectly match your design, streamlining your crafting process.
Materials You'll Need
To start creating your laser cut blanks, you will need:
- Acrylic sheets: About 3mm is a common thickness for many types of projects. You can find clear or colored acrylic sheets at craft stores or online, but it's wise to shop around to get the best quality for your needs. Acrylic comes in various finishes and colors, allowing for greater creativity in your projects.
- Laser cutter: A CO2 laser cutter, like the Flux Beamo or others, will work well for cutting precision shapes. When choosing a laser cutter, consider factors like bed size and compatibility with software, as these can significantly affect your workflow.
- Design software: Software that can create SVG files, such as Adobe Illustrator or Inkscape, is ideal for your vector designs. An understanding of how to layer designs is beneficial, as it allows for more intricate and unique cuts.
- Printer: A UV printer, such as the xTool Omni UV printer, can be used to apply designs on the cut blanks. It's worth exploring other printing methods too, as some may provide effects that better suit your artistic vision.
Creating the Design
The beauty of making your own blanks is that you don’t need separate cut files. You can utilize the same PNG file for both printing and cutting. This means you're not only saving time but resources, too. Here's how to do it:
- Open your design software and import the PNG file that contains your design. If your design is complex, consider simplifying it for better results.
- Using your software’s tools, create a cut line over the design. This line should be a vector path that closely follows the outline of your design. Make sure the cut path is precise, as even minor inaccuracies can alter the final product.
- Set the properties of this line to indicate it should be cut (as opposed to engraved or just printed). Pay attention to the stroke weight; often, hairline strokes are best for cutting purposes.
Setting Up Your Laser Cutter
Once your design file is ready, it's time to prepare your laser cutter:
- Place the acrylic sheet in your laser cutter, ensuring it’s flat and properly aligned. Even slight misalignments can lead to cutting errors, so double-check this step.
- Import the design file to the laser cutter’s software, carefully adjusting parameters such as speed, power, and frequency based on the material thickness. For 3mm acrylic, a speed of about 10-12 mm/s with a power setting around 60-70% typically works well. However, always refer to your laser cutter's guidelines for optimal settings.
Cutting the Blanks
Now it’s time to cut your acrylic blanks:
- Double-check all settings and ensure your material is secure in the laser cutter. That attention to detail could save you from wasting material and time.
- Run a test cut to ensure the settings are correct. Testing is vital, particularly on a new material or thickness.
- Once you’re satisfied, start the cutting process. Keep an eye on the machine for any issues such as material movement or errant sparks. And this is the part most people overlook: ensuring your workspace is clean and free of flammable materials.
Printing Your Design
After cutting your blanks, it’s time to bring your designs to life using your UV printer:
- Align the cut blanks into your printer tray, ensuring they are flat and securely in place. It’s often the alignment that trips up new users, causing prints to come out skewed.
- Select the appropriate settings on your printer for acrylic material, and make sure to match the printing resolution to your design’s intricacies. Higher resolution generally yields finer details, but watch out for longer print times.
- Print and allow the ink to cure adequately, following the manufacturer's instructions for the UV printer. The curing process is often underestimated: Without proper curing, the durability of your printed design could be compromised.
Common Mistakes to Avoid
As you embark on this creative project, you may encounter some typical pitfalls:
- Skipping the test cut can result in misaligned or incomplete cuts, so always perform this step. Take the time to do this—it’s a small investment for a smoother process.
- Ensuring your file has proper cut lines is key; if the cut lines are not visible in your design software, they won’t show up during the cutting process. Visibility of these lines should always be checked pre-campaign.
- Adjusting settings based on different acrylic thicknesses may be necessary, as what works for 3mm may not be suitable for thicker cuts. Test and adjust your settings on various thicknesses to establish a reliable framework for future projects.
Significance of Custom Laser Cutting
Creating laser cut blanks opens up countless opportunities for personalizing crafts, gifts, and marketable products. This isn’t just about saving money; it's about gaining artistic freedom. By crafting pieces tailored to your exact design vision, you tap into a market that craves unique and custom items. The DIY movement continues to grow, and with it comes an increased demand for personalized products, ranging from home décor to bespoke gifts.
If you're working in this space, understanding the importance of personalized items can mean the difference between a hobby and a profitable venture. Many find this hands-on approach fulfilling not only financially but creatively.
With practice, the process will become second nature, enhancing your crafting repertoire and allowing for endless creativity. Happy crafting!


