Sample No. 0250
Make a Halloween Fairy House from a Wooden Birdhouse
Turn a wooden birdhouse into a Halloween fairy house with black and lime paint, faux flower roof tiles, tiny pumpkins, moss and handmade hanging ghosts.
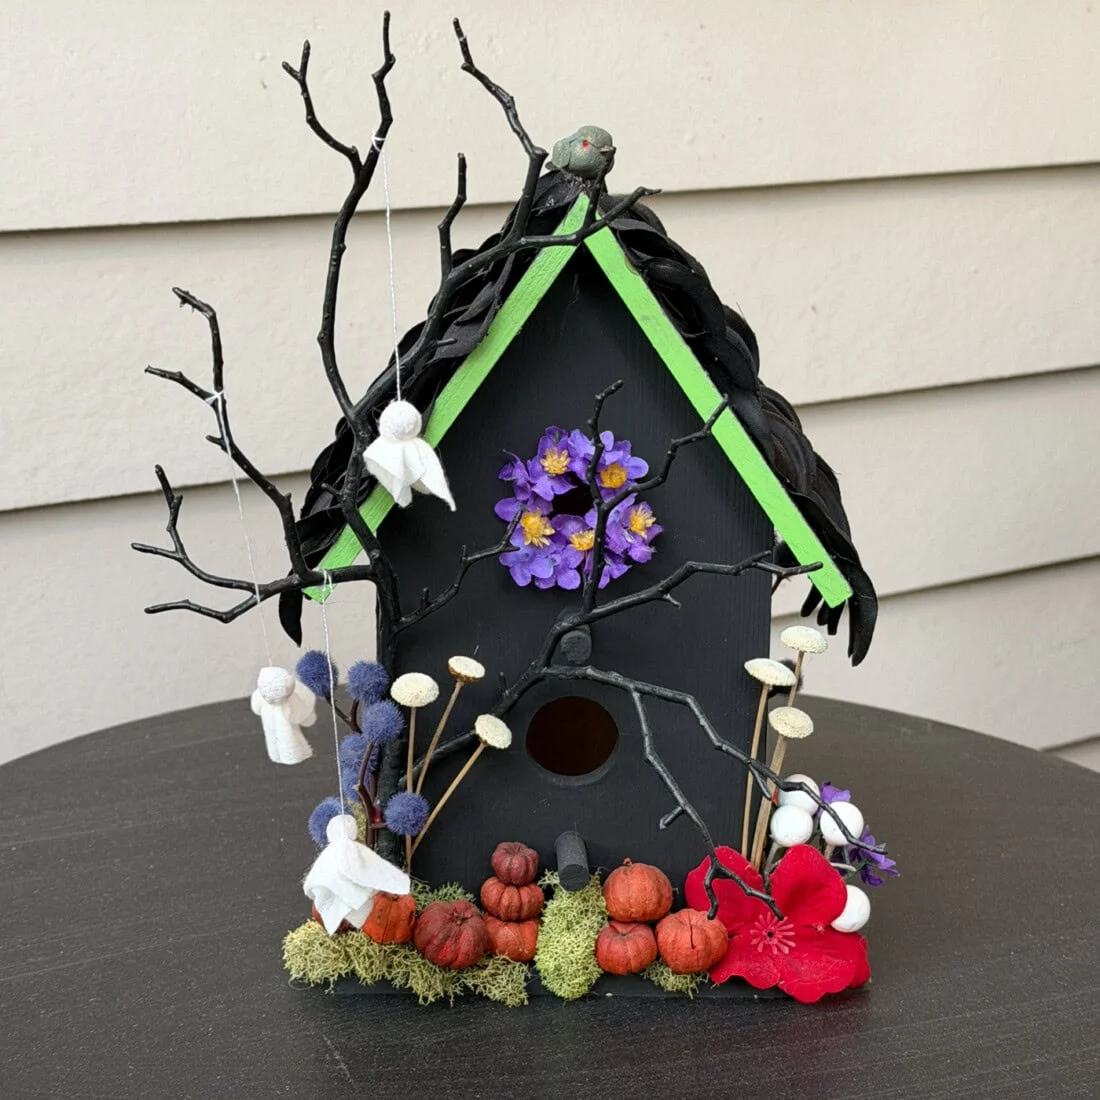
A plain wooden birdhouse can become a tiny Halloween scene with a few painted surfaces and small decorations. Amanda Davis made this fairy house with black and lime green acrylic paint, faux flowers, miniature pumpkins, moss and a miniature bird. The hanging ghosts are made from dried baby wipes and string, while petals from a black faux flower become roof tiles.
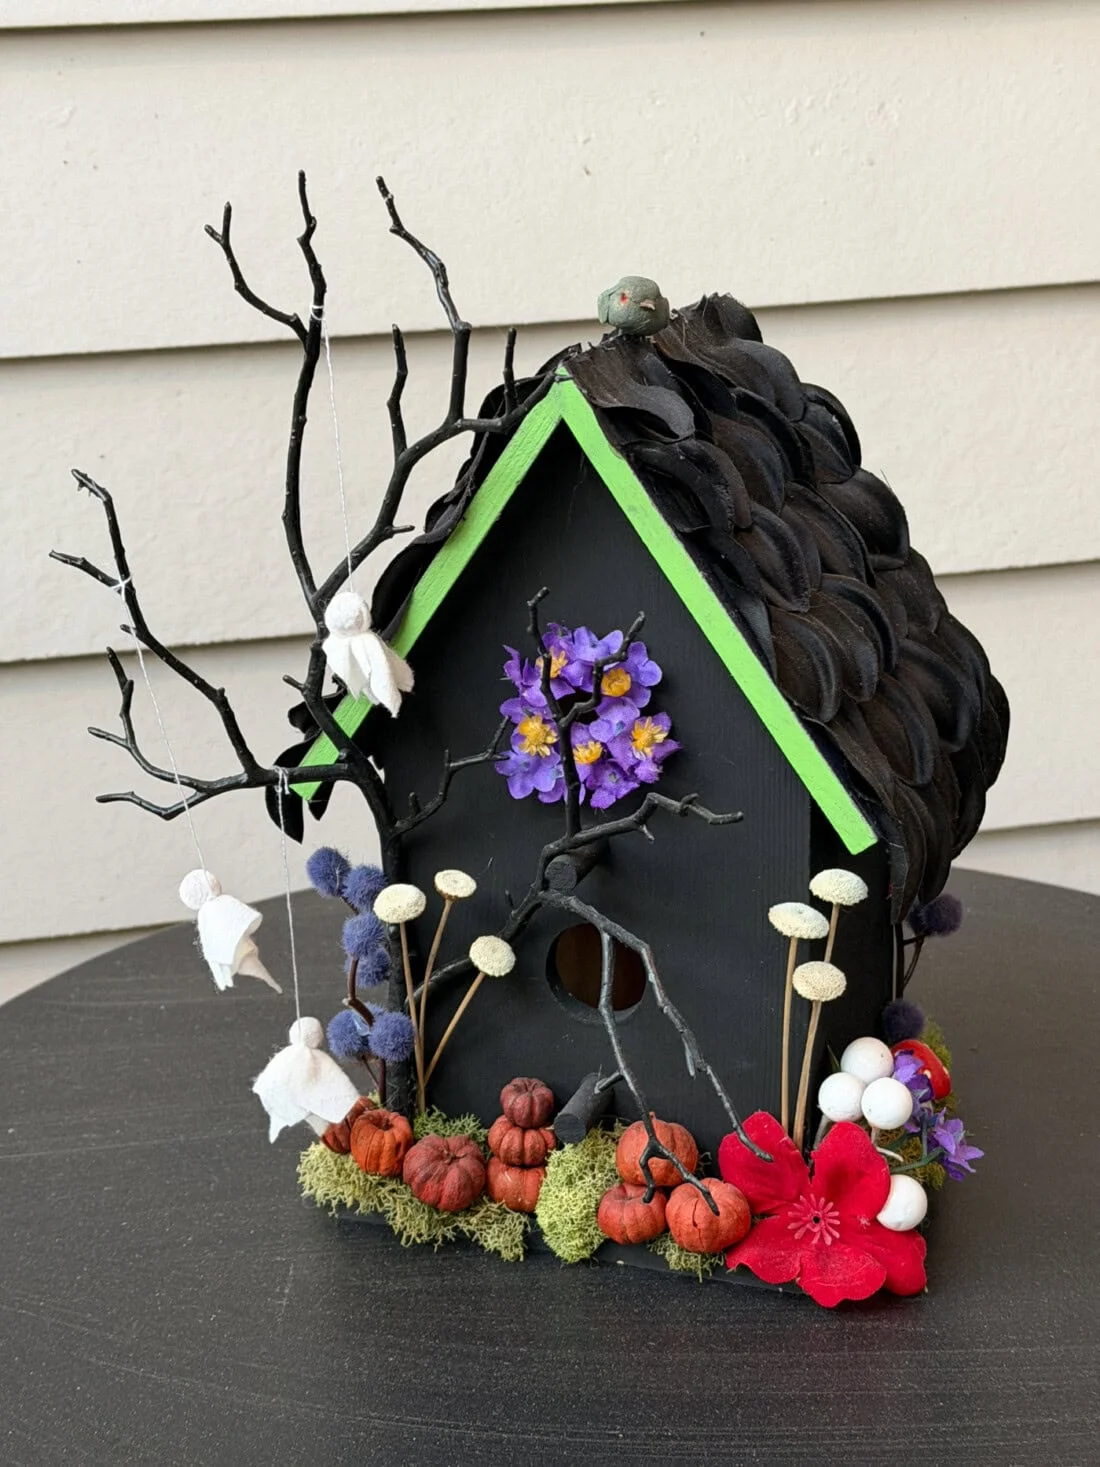
The finished piece has several small areas to decorate: the birdhouse itself, its roof, the space around the base and a nearby branch for the ghosts. It’s a decorative project with plenty of room to use embellishments you already have. Davis displayed hers on a front porch, sheltered from rain; she notes that the house isn’t weatherproof.
Materials and embellishments
- Wooden birdhouse
- Black and lime green acrylic paint
- Miniature pumpkins
- Miniature bird
- Moss
- Various faux flowers
- Baby wipe
- String
- Black branch
Davis says wooden birdhouses are available at craft stores, dollar stores and big box stores. She doesn’t recall where she bought hers, but links to the same birdhouse she used. Her preferred paint is Americana acrylics, which she describes as smooth to apply and quick to dry.

The tiny pumpkins and bird came from craft-store finds. Davis suggests looking among the small embellishments used for fairy gardens. She used leftover faux flowers from earlier projects, including a black flower whose petals suited the roof. That approach makes the decorations flexible: choose miniature pieces and flowers that fit the scale of your birdhouse.
Paint and decorate the roof
Begin with the wooden birdhouse and use the black and lime green acrylic paint to create its Halloween color scheme. The source doesn’t give a paint layout or drying time, so decide where you want each color and follow the paint’s own directions before adding decorations. A dry surface gives the small pieces a better base.
For the roof, Davis used the petals from a black faux flower as small tile shapes. Separate the petals and place them across the roof to create the shingled look shown in the project. The source shows the petals being glued in place, though it doesn’t specify a particular adhesive or how many petals to use. Work across the roof, adjusting the placement to suit its size.
Make the hanging ghosts
The ghosts use a dried baby wipe, cut into squares, plus string. Davis keeps baby wipes in her craft room to clean acrylic paint from her hands. For this project, she let one wipe dry and cut it into small pieces. If you’re preparing the wipe yourself, let it dry before cutting it into squares.
To shape each ghost, wad a small bit of the dried wipe into a head. Wrap string around the material just below the head to form the neck. Tie or arrange the string so the ghost can hang from the black branch, then make as many as you’d like for the scene. The source doesn’t give a size or count, so the small figures can be scaled to the branch and birdhouse.
Arrange the miniature scene
With the painted house, roof petals and ghosts ready, add the garden details. Davis made a wreath from faux purple and yellow flowers, stacked miniature pumpkins on moss, and placed more faux flowers around the bottom. Add the miniature bird to the roof, as shown in her finished piece, and position the branch so the ghosts sway nearby.
Keep the finished fairy house in a sheltered spot. Davis displayed hers on the front porch but kept it out of the rain because it isn’t weatherproof. The result is a small seasonal display built from a wooden birdhouse and craft-store details, with the handmade ghosts adding a little movement to the scene.
Project by Amanda Davis.